on (1756 - unknown), often known by the adopted name of Connor, was a Native American Assassin of theKanien'kehá:ka during the time of the American Revolutionary War. He was an ancestor of Desmond Miles.
Ratonhnhaké:ton was born to the Templar Haytham Kenway andKaniehtí:io, a Native American woman of the Kanien'kehá:ka village in Kanatahséton. In 1760, while he was still a young child, he watched as his village burned down and his mother died. Nine years later, he went on a journey to join the Assassin Order.
Charging the Templars with the destruction of his village and death of his mother, Connor pursued them in an attempt to exact retribution by assassinating Charles Lee.
Contents[show] |
Biography
Early life
- "On this land, I am torn. Part of me wants to fight and repel all outsiders. The other part of me is the outsider."
- ―Ratonhnhaké:ton reflecting on his parentage.[src]

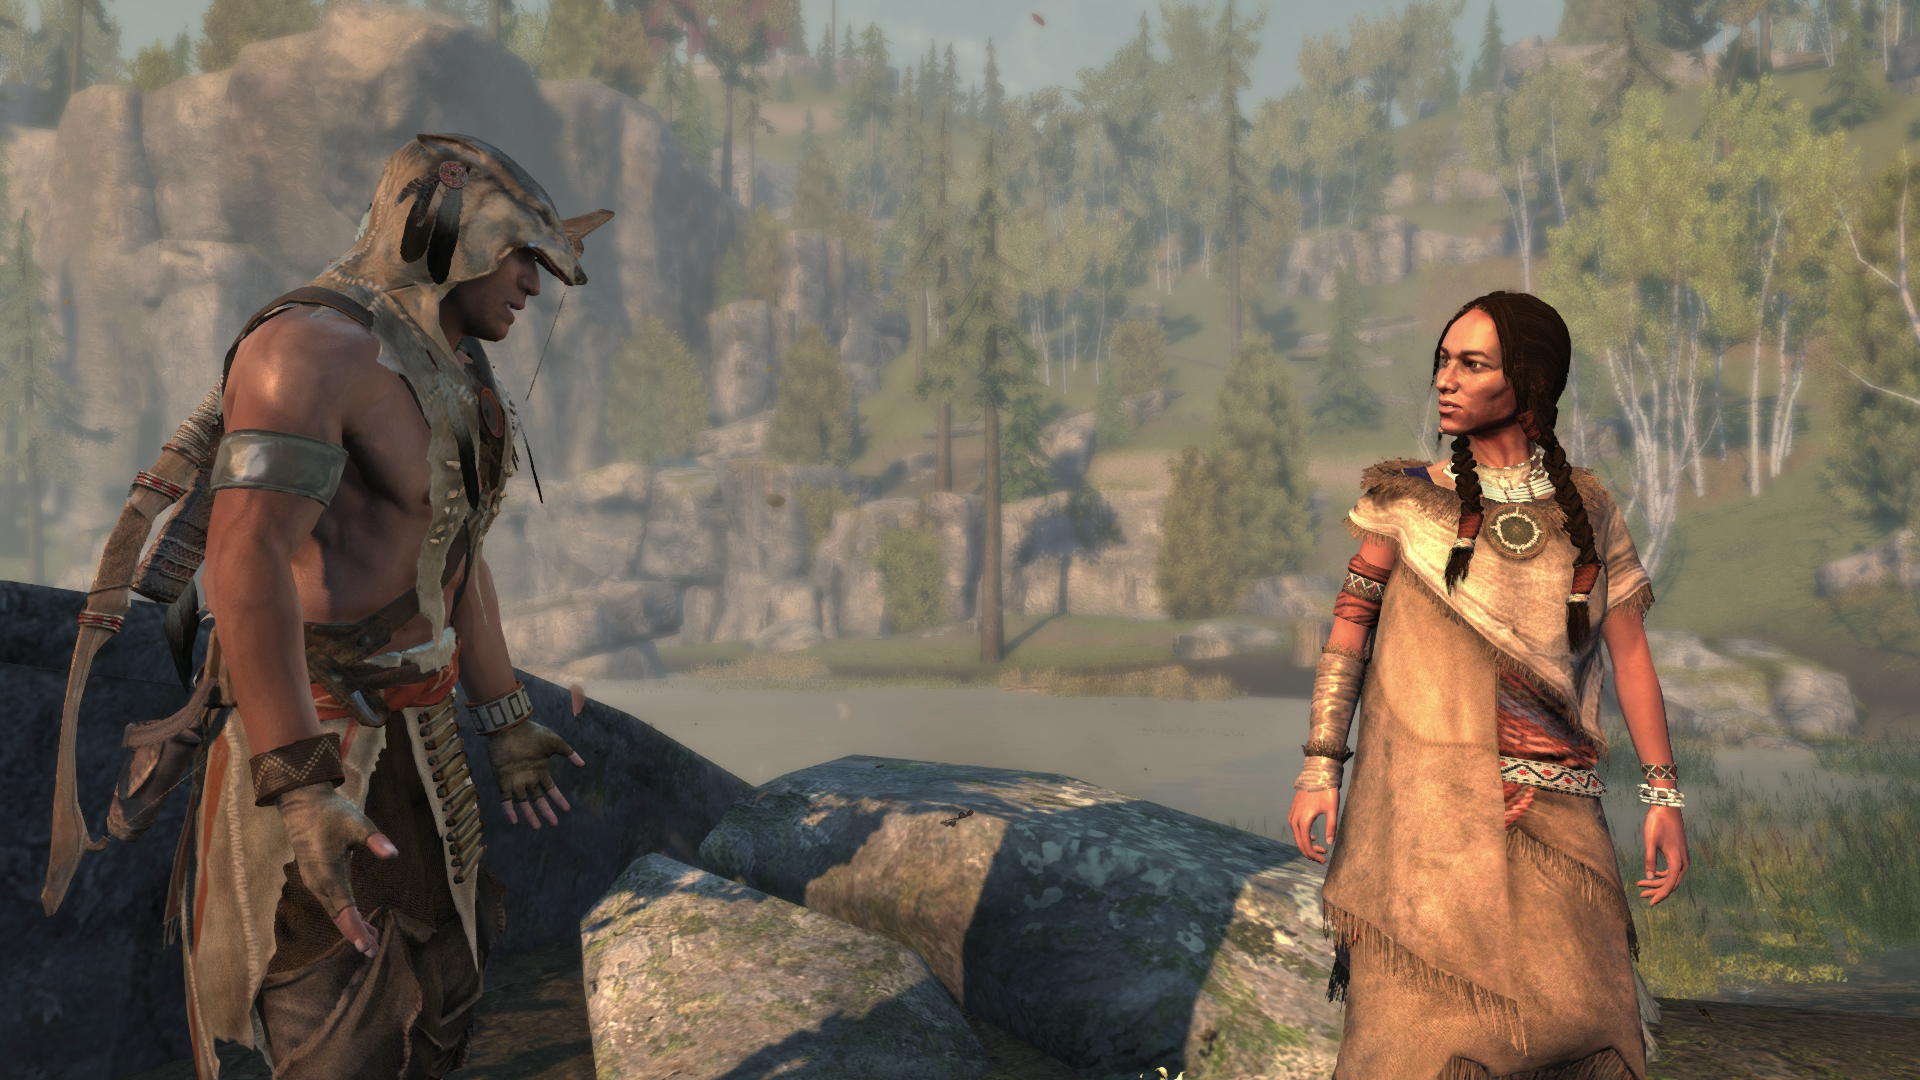
Born to Haytham Kenway and Kaniehtí:io, Ratonhnhaké:ton was raised among his mother's village in Kanatahséton. His childhood was spent in the company of the other children in his village, including Kanen'tó:kon, whom he remained friends with into his later life.[1]
When Ratonhnhaké:ton was five, he ventured into the grounds outside his village to play hide-and-seek alongside the other Kanien'kehá:ka children. While he managed to locate all of the others on his turn, he was assaulted by members of the Templar Order as he hid, who were seeking the Precursor site rumored to be near Kanatahséton. Despite his capture, he defiantly demanded to know the name of the leader of the group, and Charles Leeanswered him, amusedly inquiring why the child wanted to know. Ratonhnhaké:ton then promised that he would find Lee, but the Templar only brushed off his statement.[1]
Proving useless to the Templars' aims, Ratonhnhaké:ton was knocked unconscious, only to wake up and find his village in flames. This event led Ratonhnhaké:ton to mistakenly assume that Lee and his Templar brethren had been responsible for Kanatahséton's razing, with his conviction made stronger in the fact that the fire had taken his mother from him, and would later prompt Ratonhnhaké:ton to seek justice for his people and fight tyranny wherever he came across it.[1]
Joining the Assassins
- "The others in the village – they thought this was something I wanted. Something I chose to do. But it never felt that way to me. No, it was not a choice. It was an obligation."
- ―Ratonhnhaké:ton, on seeking the Assassins.[src]

Ratonhnhaké:ton remained in his village until 1769, but would always question why his people were not allowed to leave the valley that they inhabited. When he was 14, he finally gained some answers from Oiá:ner, the Clan Mother of the village, who met with him in private to explain.[1]
She showed Ratonhnhaké:ton a Crystal Ball, and told him that their people had been tasked with guarding a secret on their lands. Upon holding the Piece of Eden, Ratonhnhaké:ton heard the voice of Juno, and found himself standing in the Nexus.[1]
Juno led him on a "spirit journey", giving him the form of an eagle as she led him through a foggy landscape. She told him that the path in life he was currently taking would allow the Templars to gain premature access to theGrand Temple, which would bring the world into ruin. Juno then instructed him to seek out a certain symbol that would lead him to the right path.[1]
Upon regaining consciousness, Ratonhnhaké:ton found himself at the edge of the valley by a river. As he drew the symbol he had been shown into the sand on the river bank, the Clan Mother came up behind him, and asked where he had seen it. He explained that a spirit had shown it to him, and the Clan Mother understood what had been asked of him.[1]
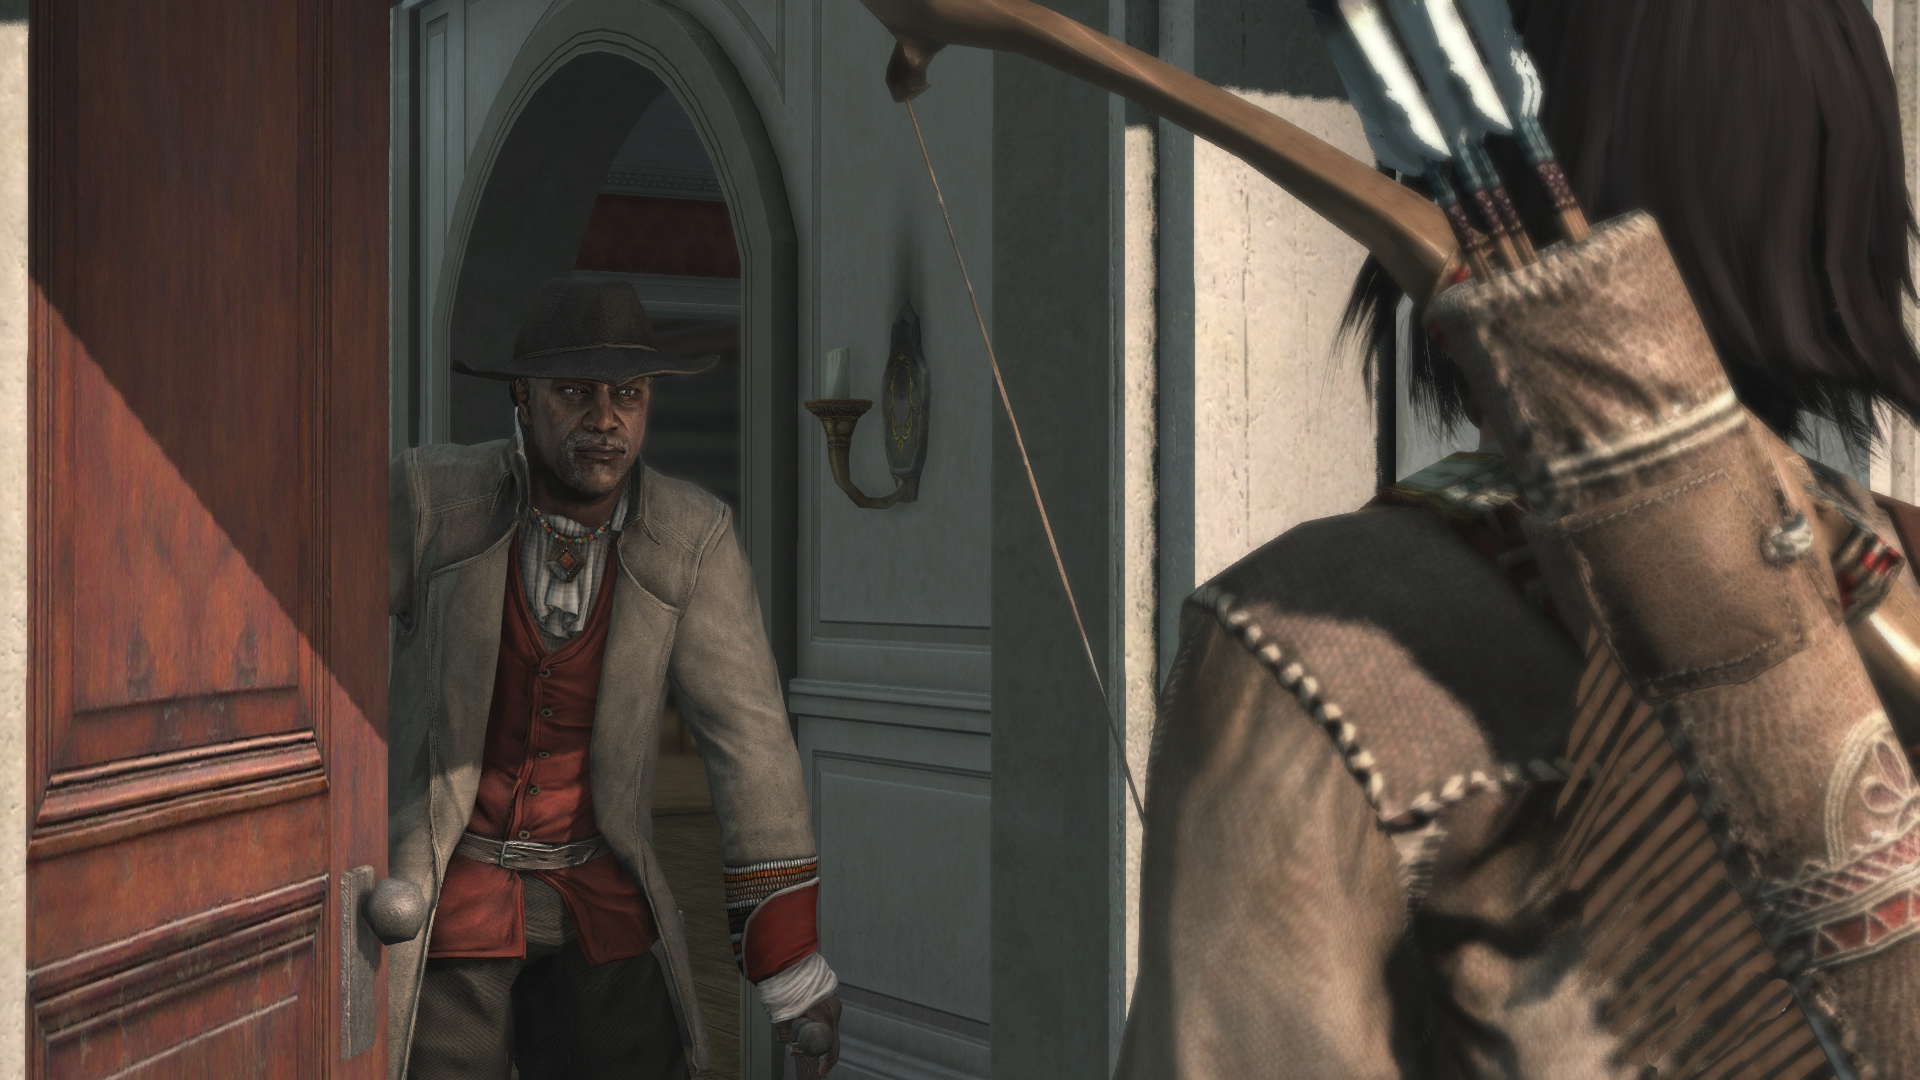
She directed him to a homestead that lay in the east, where she claimed to have seen the symbol before, and formally gave him permission to depart the valley. Ratonhnhaké:ton crossed theFrontier, and arrived at a run-down manor sometime in the year 1769. He knocked on the door, and was greeted by an elderly man.[1]
Ratonhnhaké:ton hesitantly stated that he had been told to go there for training, but the man only denied him and shut the door in his face. After spending a night in the nearby stables, the young Native American tried again the following morning, but the man only yelled at him to get off his land.[1]
He persisted stubbornly, banging on the manor's back door, and climbing up onto the balcony to try to gain entrance there, though the man intercepted him. He threw Ratonhnhaké:ton to the ground and sternly insisted that he move on, as the world already had. Ratonhnhaké:ton returned to the stables once more, angrily calling back that he would not leave until the man agreed to train him.[1]
That night, bandits infiltrated the homestead and passed by the stables as they discussed their attack. Ratonhnhaké:ton, woken by their voices, asked them what they were doing. The thugs attacked him, though he was able to fend most of them off. However, the leader of the bandits hit him from behind, knocking him to the ground and questioning whether he was working for the owner of the homestead. At that moment, the old man came to Ratonhnhaké:ton's rescue, stabbing the bandit leader in the back.[1]

He bade Ratonhnhaké:ton to clean up the mess, then to follow him into the manor so that they could talk. There, the man finally told him about the conflict between the Assassins and the Templars, before he revealed himself to be a Master Assassin named Achilles Davenport.[1]
He also showed him a hidden room in the basement of the manor, which held an Assassin's robes and a pair of Hidden Blades. Achilles then led him to a wall that held the names and portraits of the Templar leaders in the colonies, namely William Johnson, John Pitcairn, Thomas Hickey, Nicholas Biddle, Benjamin Church, Charles Lee, and Ratonhnhaké:ton's father, Haytham Kenway, the Grand Master of the Templar Order's Colonial Rite.[1]
Boston Massacre
- Connor: "Is that my father...?"
- Achilles: "Yes. Which means trouble is sure to follow. I need you to tail his accomplice. This crowd is a powder keg – we can't allow him to light the fuse."
- ―Connor and Achilles during the riot in Boston.[src]
Achilles continued to train Ratonhnhaké:ton for the next few months at the homestead, beginning his teaching on the vital skills that would shorten the gap in experience between Ratonhnhaké:ton and his father. In March of 1770, Achilles invited Ratonhnhaké:ton to come with him to Boston, where they could purchase supplies for repairing the manor.[1]
There, in order for Ratonhnhaké:ton to more easily move through colonial circles, Achilles suggested that he take on the name "Connor" after his late son, Connor Davenport, who had died a few years earlier.[1]
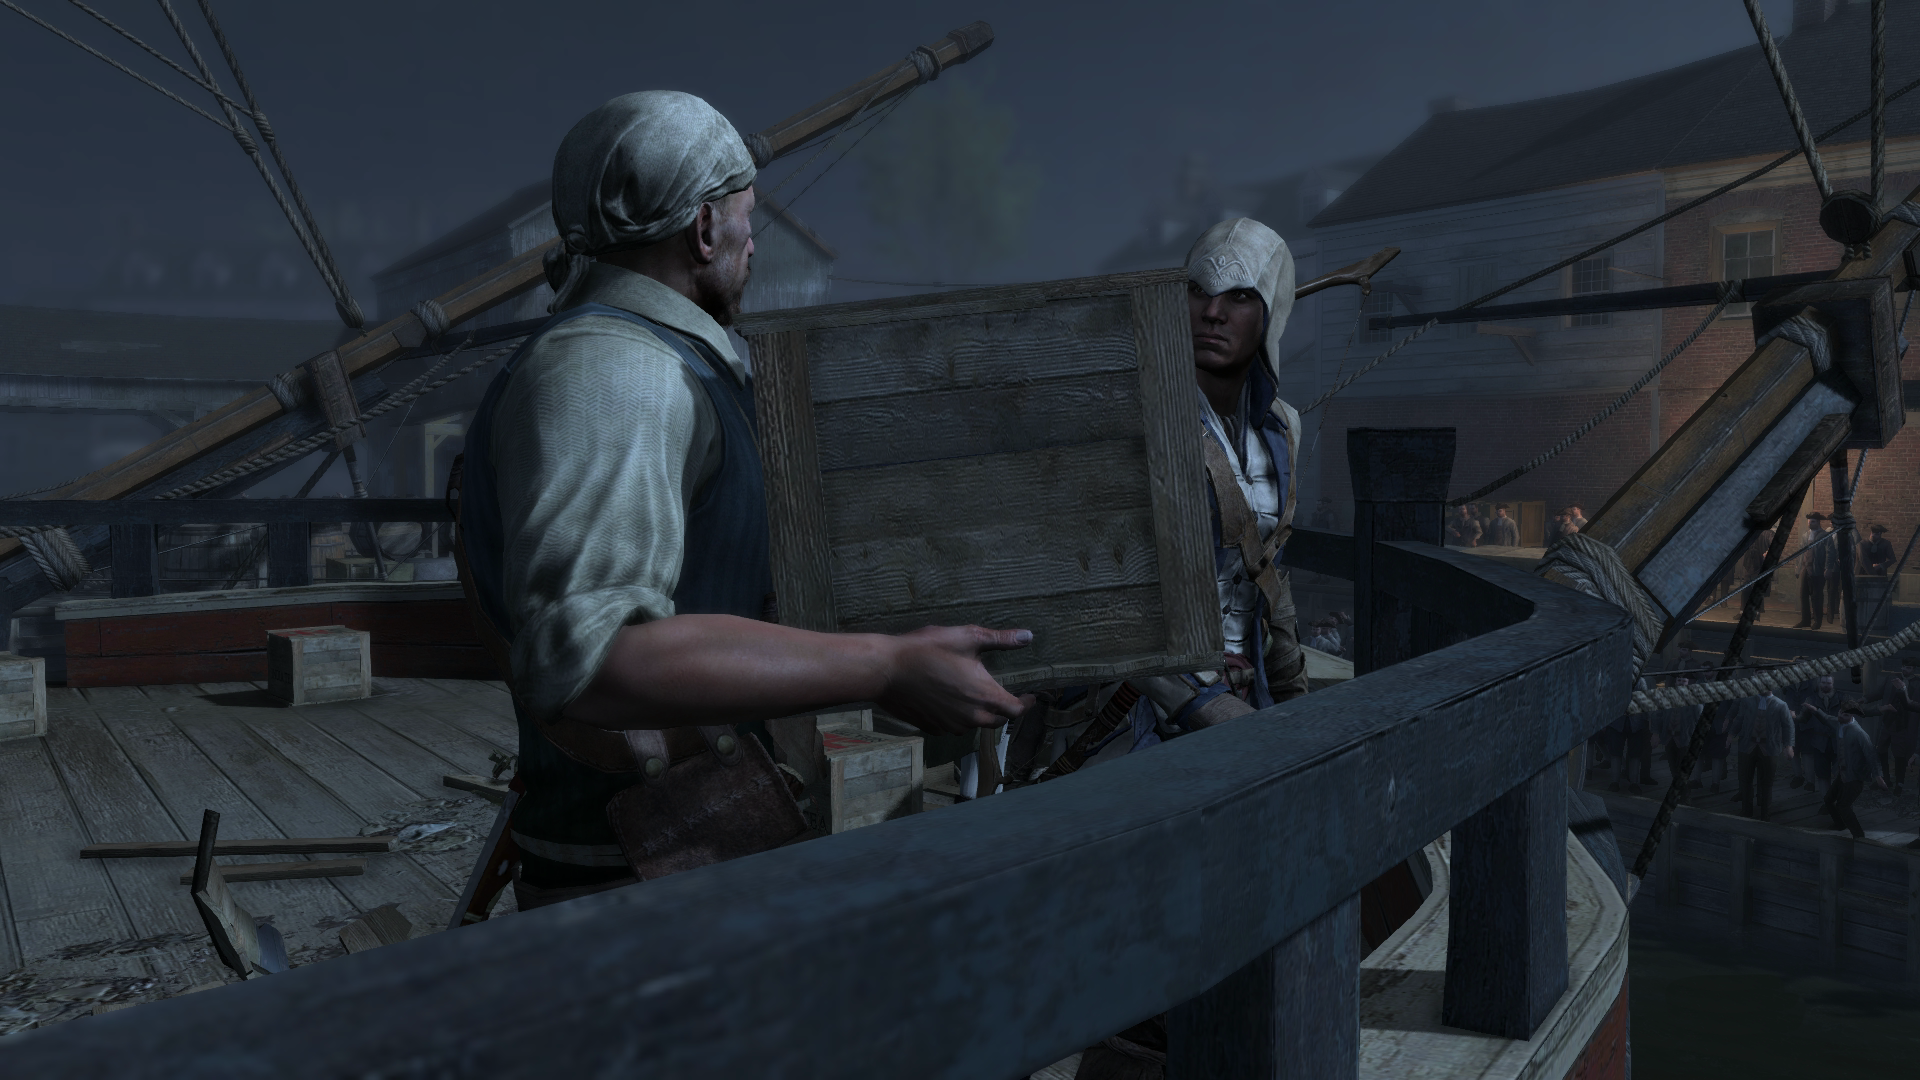
Connor was awed by the sights and life of the city, so much so that Achilles needed to scold him for staring at passing townspeople. Achilles then directed him to a nearby general store where he could buy lumber and other construction materials, and have them brought back to their carriage.[1]
After purchasing the items on Achilles' list, Connor passed by a rioting crowd, who were yelling at the local British soldiers to leave Boston. Connor returned to Achilles' side as they observed the uproar, until they spotted Haytham Kenway speaking with another man in the crowd. Achilles, worried that the Templars would worsen the already delicate situation, sent Connor to discover what Haytham and his associate were planning.[1]

Despite wishing to approach his father, Connor obeyed Achilles' instruction to follow the other man instead. Connor tailed him up onto the rooftops, and was able to stop the man from firing a shot into the crowd.[1]
However, Charles Lee, who had been standing on a rooftop on the opposite side of the street, fired his pistol into the air and caused the British soldiers to attack Boston's citizens out of startlement. In the confusion, Haytham approached one of the guards and pointed out Connor, prompting several troops to pursue him through the city, and later accuse him of firing the first shot.[1]
Upon managing to escape the guards, Connor was approached by a man, who instructed him to seek out someone who could help him, Samuel Adams. Samuel aided Connor in clearing his name by teaching him how to removewanted posters, and to bribe either town criers or printing shops to announce false propaganda. Afterwards, Samuel led Connor to Boston's port, where he could safely sail back to the Davenport Homestead.[1]
After returning to the homestead, Connor angrily confronted Achilles, accusing him of abandoning him in Boston, but Achilles calmly remarked that the day of experience had been more valuable than months of training. In acknowledgement of his achievements, Achilles finally entrusted Connor with two Hidden Blades.[1]
Becoming an Assassin
Shortly after their return from Boston, Connor and Achilles were alerted by a man banging on the window of the manor and calling for help. Connor immediately followed him to the nearby river, and saw a second man clinging to an adrift log, which was rapidly heading towards a waterfall. Connor chased him along the riverbank, before jumping into the water to save him from falling to his death ahead.[1]
After finding out that the two men, Godfrey and Terry, were loggers in search of a place to build a mill, Connor offered them a good location on the homestead. Grateful, the two men and their families set up their homes on the property, marking the first of many residents to come.[1]
Over the next few years, Ratonhnhaké:ton would help many people around the area, and request them to settle on the homestead, which grew into a small community. He would buy raw materials and crafted goods from the residents and sell them through convoys, as well as protecting them from outsiders when necessary.[1]
Sometime after saving Terry, Achilles instructed Connor to meet him by the homestead dock in order to look over something that he simply called "an asset". Upon arriving, Connor saw the remains of a ship in disrepair, as well as a small shack overlooking the bay.[1]
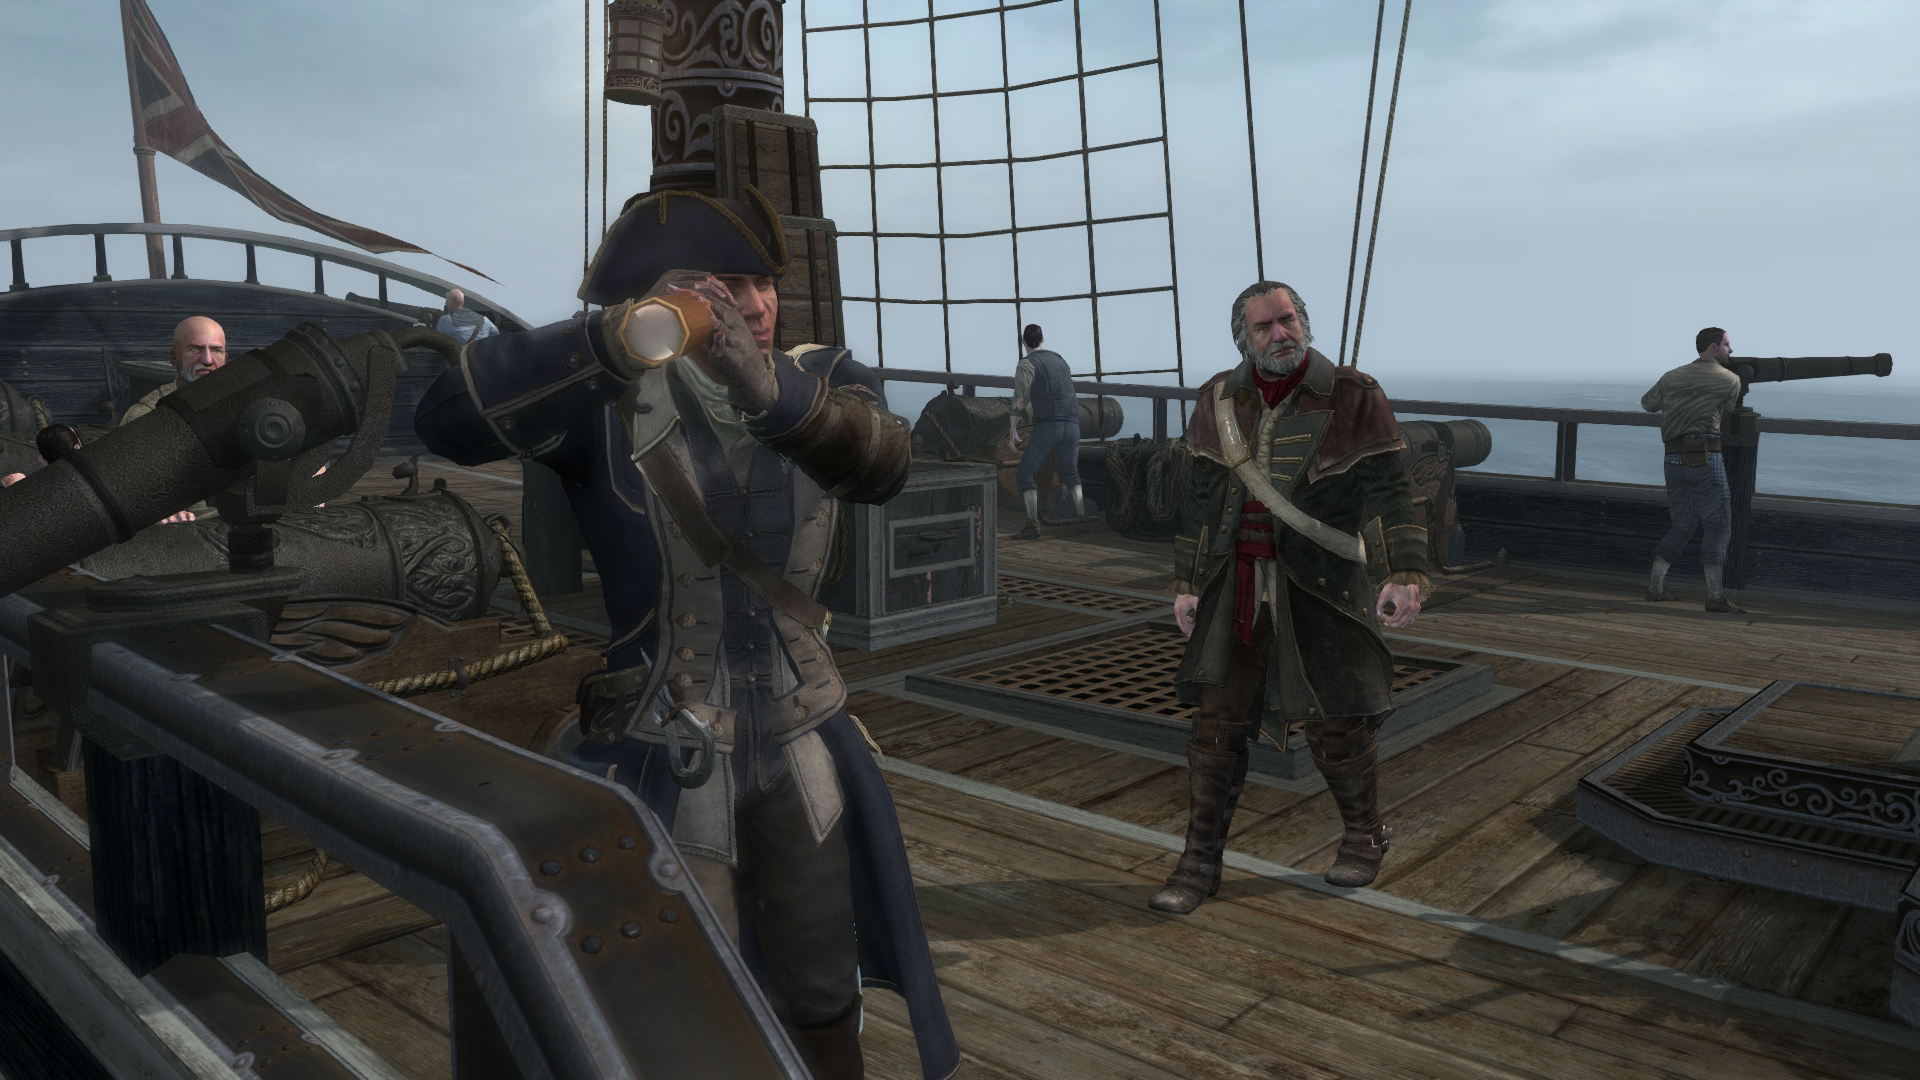
He and Achilles entered the shack and met with Robert Faulkner, the first mate of the ship in the harbor, the Aquila. Connor offered to pay for her repairs, and Robert gladly agreed to gather a crew for the vessel, and restore her to sailing capability. For the next three years, Connor trained with Achilles.[1]
After the Aquila had been repaired, Robert invited Connor along to have the ship fitted with cannons. Connor joined him without hesitation, and the two were out at sea for weeks, where Robert taught Connor to both sail the ship and fire her cannons. Following this, they dealt with a few privateers, before making their way back.[1]

On his return, he heard a drunken man shout about letters he possessed, written by the infamous William Kidd. Connor soon spoke to "Peg Leg", who explained the letters he obtained hinted at the location of a great treasure. He would give them to Connor in exchange for "trinkets" from treasure boxes hidden across the American frontier.[1]
When he finally returned to the manor, he was berated by Achilles, who accused him of leaving for so long without as much as a goodbye. Nevertheless, Achilles led Connor down to the manor basement, in order to bestow on him the Assassin robes there. Though Achilles admitted that the Order usually had a ceremony for such an occasion, neither he nor Connor seemed the type for such things. Instead, after Connor had donned the robes, Achilles simply verbally welcomed him into the Brotherhood of Assassins.[1]
Adventures at sea
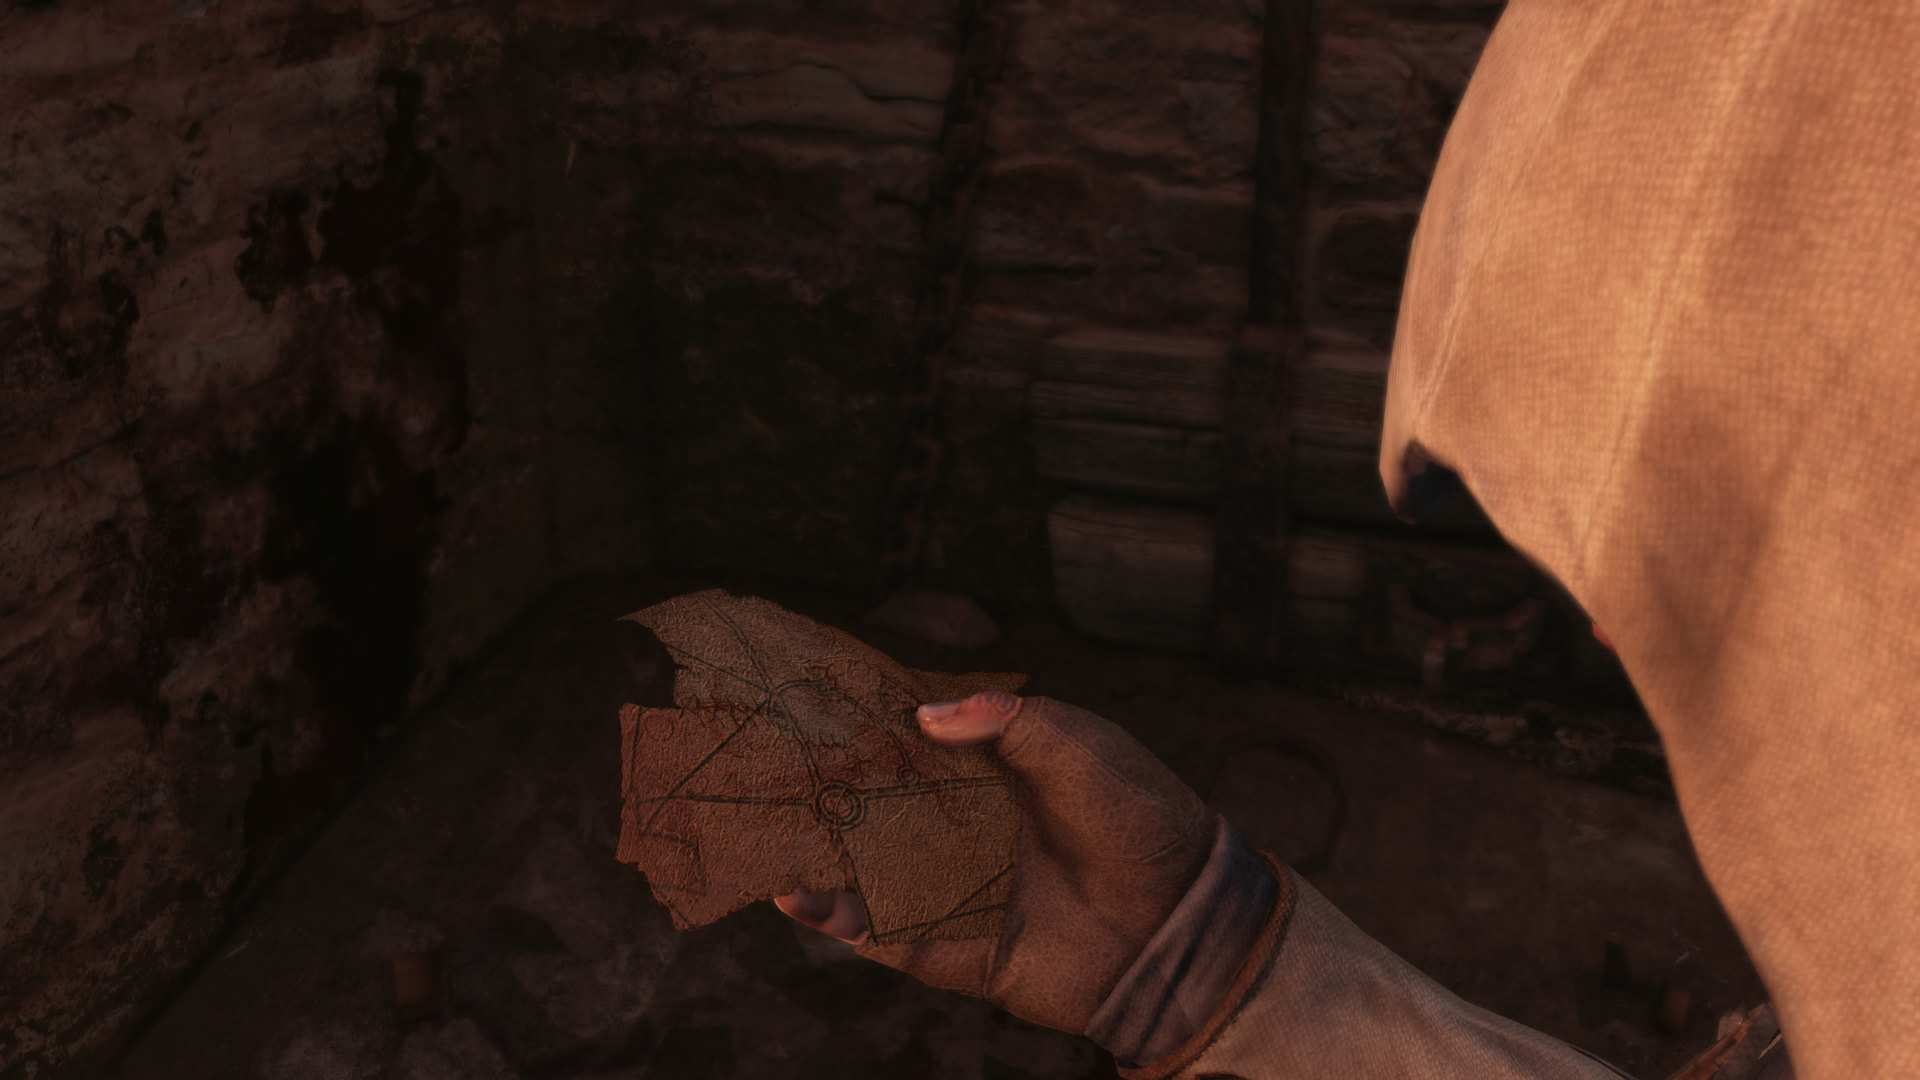
In 1773, after exchanging one trinket, Connor received the first of William Kidd's letters from Peg Leg. The document was addressed to a man known as "Lucky" Lem, who was imprisoned in Fort Wolcott. In response, Connor infiltrated the fort and recovered a piece of a map from Lem's cell, which contained the description "It lies under the eagle's bed." Connor then made his escape while theAquila opened fire, diving into the sea as the fort was set ablaze.[1]
While investigating raids on the Nantucket coast in 1773, Connor and Faulkner found Fort Phoenix to be occupied by Templar forces. They successfully destroyed it, but the raids continued nevertheless.[1]
The Revolution
Boston Tea Party
Later that year, Kanen'tó:kon came to visit Connor at the homestead, bringing news that William Johnson was attempting to lay claim on their nation's land without their consent. Outraged by the thought, Connor immediately decided to seek out Johnson.[1]
Though Achilles tried to keep him from acting hastily, Connor argued that he had made a promise to protect his people. Connor then took a hatchet from Kanen'tó:kon and buried its blade into one of the manor's columns, explaining that doing so signified the start of a war to his people, and that the hatchet would not be removed until the danger had passed, despite Achilles' bewilderment at the property damage.[1]
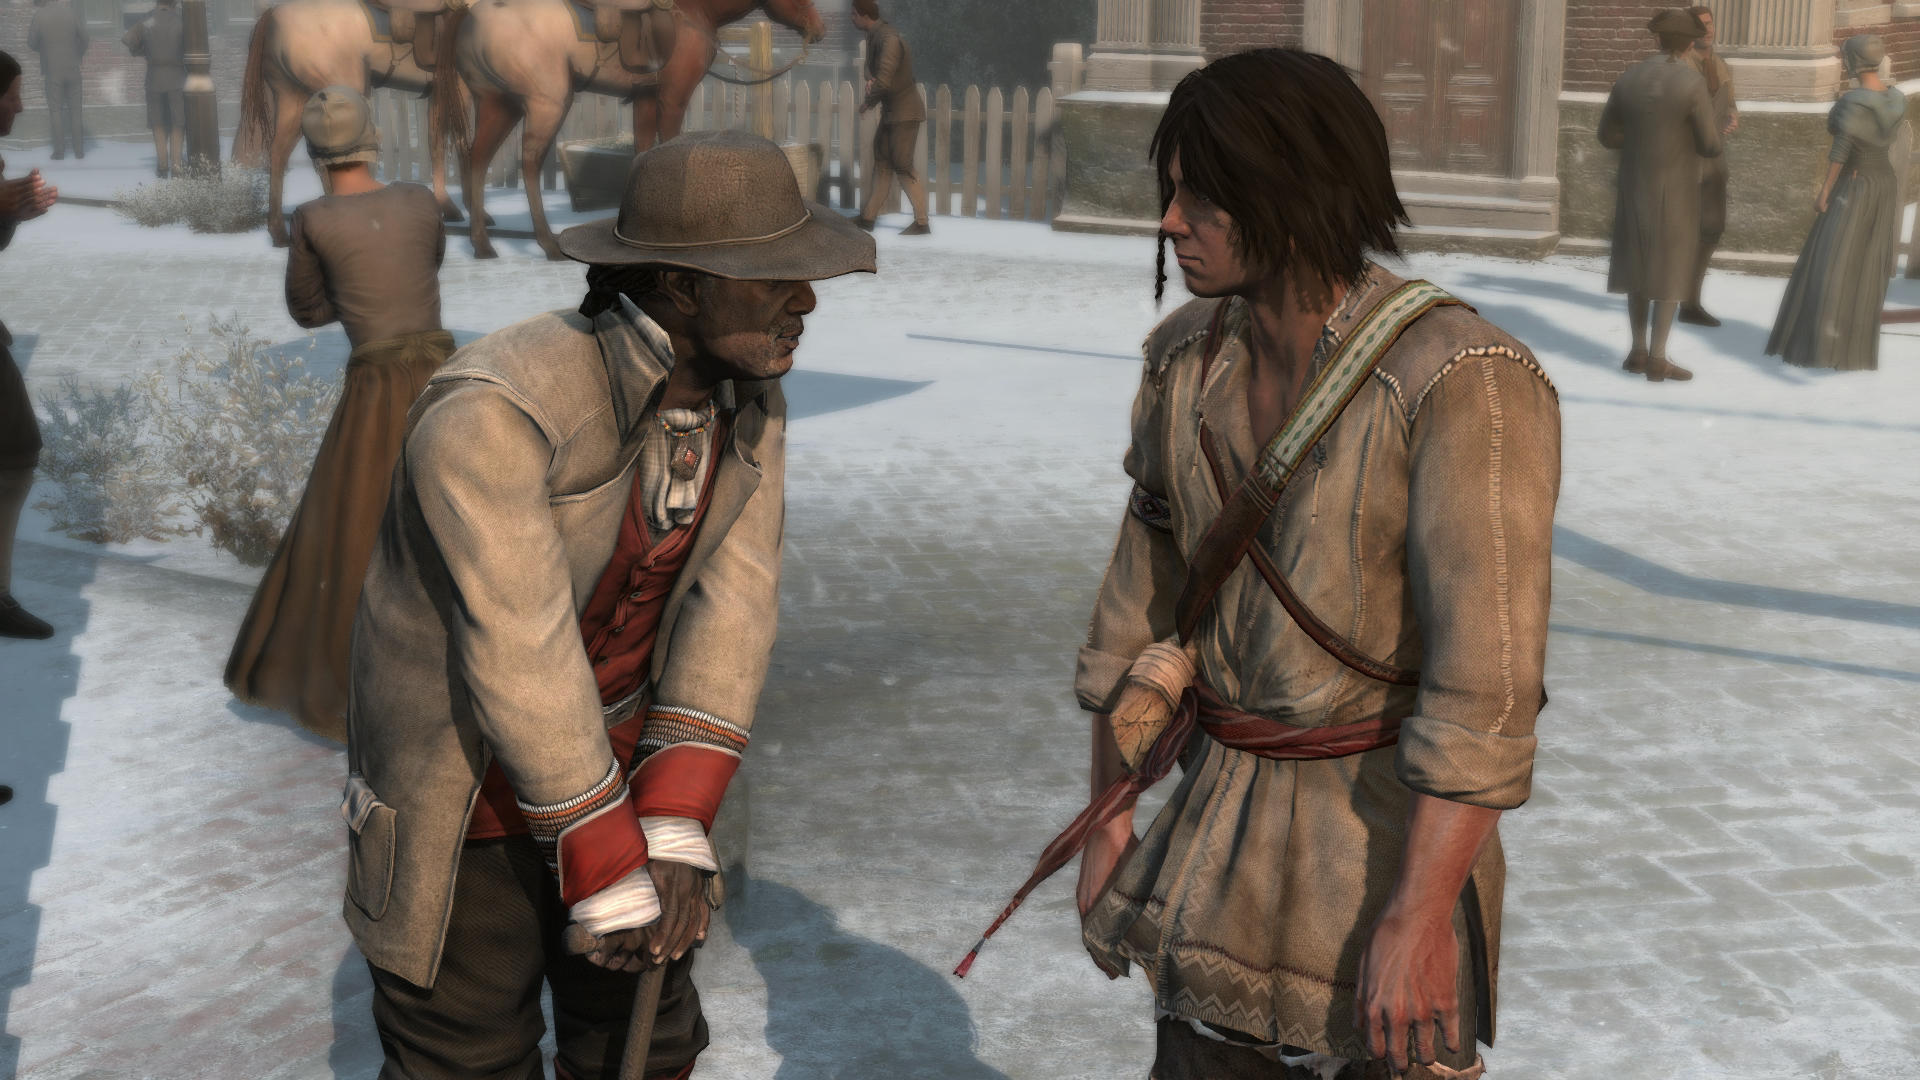
Connor later met up with Samuel Adams, who offered to help him in finding Johnson, but only after he had helped Adams cripple Johnson's tea extortion. During his assistance, Connor metStephane Chapheau, a French taverner, and helped him ward off tax collectors that were harassing him. Soon afterwards, Stephane went into a violent rage, and caused various riots around Boston against the Loyalists.[1]
After finding the main overseer of the tea's transportation, Connor had Stephane assassinate him, taking him on as an apprenticeafterwards. Later, Connor met with Adams again, who aimed to recruit the Assassin into dumping the newly arrived shipment of tea into the ocean, which Connor accepted.[1]
During this, Connor protected the Sons of Liberty during the Boston Tea Party, and smugly dropped the last crate of tea into the water as a show of rebellion, in front of Johnson, who was watching from a distance. Following this, seeing the oppression of the people by the Templars, Connor began helping out people throughout Boston. As a result, he recruited a few of these men and women, taking them on as apprentices, just as he had done with Stephane.[1]
Six months later, Kanen'tó:kon led Connor to Johnson Hall, where William Johnson was attempting to negotiate with the local Native American elders. Though Johnson promised them protection, the natives firmly told him that his words were hollow, and that they would not sell their land to him.[1]
As Johnson decided to try convincing them with violence instead, Connor swiftly assassinated him from above. In his last words, Johnson told Connor that he had not wished to own the lands for profit, but to ensure peace and protection for all the nations.[1]
Afterwards, Connor was given Kidd's letter to Abel Owens, who had been shipwrecked on Dead Chest Island. Once at the island's ship graveyard, Connor encountered scavengers who had recovered Owens' portion of the map, to which he gave chase. After he dispatched them, Connor read out the next clue, "Near the wolf's abode." In 1774, Connor also sailed to the jungles of Cerros, where he recovered William Kidd's personal sword from a Mayan pyramid.[1]
Igniting the Revolution

A year later, a messenger arrived at the homestead, bearing a request for Connor to aid a man named Paul Revere. Connor politely refused the offer, frowning on the fact that the Sons of Liberty mistook him as one of their own. However, when Achilles pointed out that the Templar John Pitcairn was mentioned within the letter, the Assassin relented.[1]
Though he met with Paul Revere, Connor was disappointed to find that Pitcairn was not present. Instead, Revere recruited his help in riding to warn the inhabitants of Lexington and Concord about the incoming British Army; with the promise of later locating Pitcairn.[1]
After the ride, Connor joined the Continental Army at Lexington, where a bloody battle ensued. Pitcairn was present at the fight, but Connor chose to help in the defense of the town, rather than pursue his true target.[1]
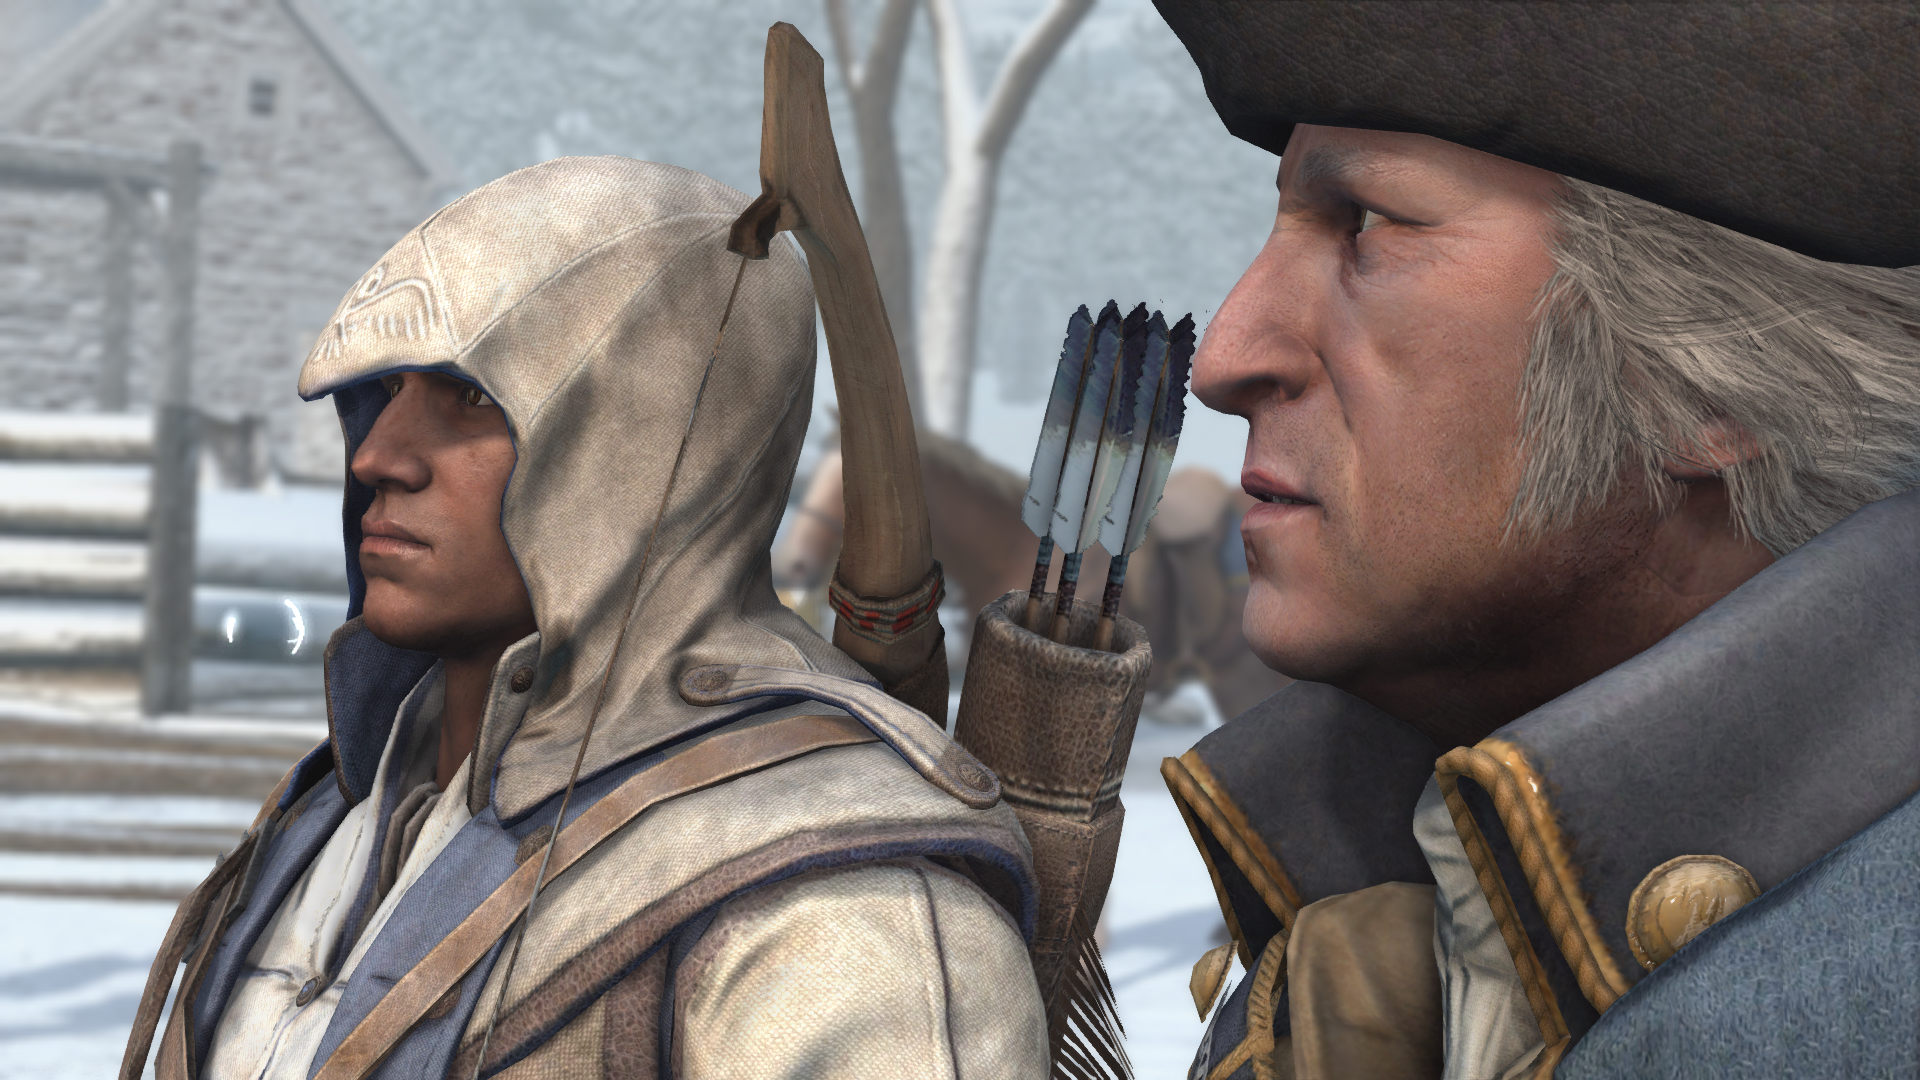
Later, Connor accompanied Samuel Adams to George Washington's induction as Commander-in-Chief of the Continental Army. Midway through Washington's speech, Connor heard the voice of Charles Lee, who had been sitting behind him. He immediately stood to confront Lee, but Samuel quickly intervened, pulling him away and attempting to distract him by introducing him to Washington. Washington greeted him warmly, and Connor admitted that the man before him would be the one to lead the country into freedom.[1]
Connor was later directed to Bunker Hill, where the forces of Israel Putnam were engaging the British troops of Pitcairn. Connor offered Putnam his help in disabling the ships that were pinning down the Continental forces with cannon fire, as destroying the artillery would drive Pitcairn out of hiding.[1]
After Pitcairn and his troops retreated to a more secure position outside of the city, Connor infiltrated the camp and managed to assassinate him from the treetops above. Pitcairn gave the same justifications for his actions as Johnson, and as he died, Connor recovered a letter from his body that gave evidence of an assassination plot on George Washington's life, escaping before the Regulars could attack him.[1]

Connor started investigating the plan to kill Washington, although he didn't make much progress. In early 1776, Achilles contacted Benjamin Tallmadge, an ally of the Brotherhood, who led Connor to New York in search of Thomas Hickey. Tallmadge explained that Hickey was responsible for running a counterfeiting ring there, and was plotting to murder Washington.[1]
When Connor arrived at Hickey's operation, he drew his Hidden Blade, revealing himself to be an Assassin. Hickey commented that he had thought Connor's kind had been wiped out, before escaping out of the building.[1]
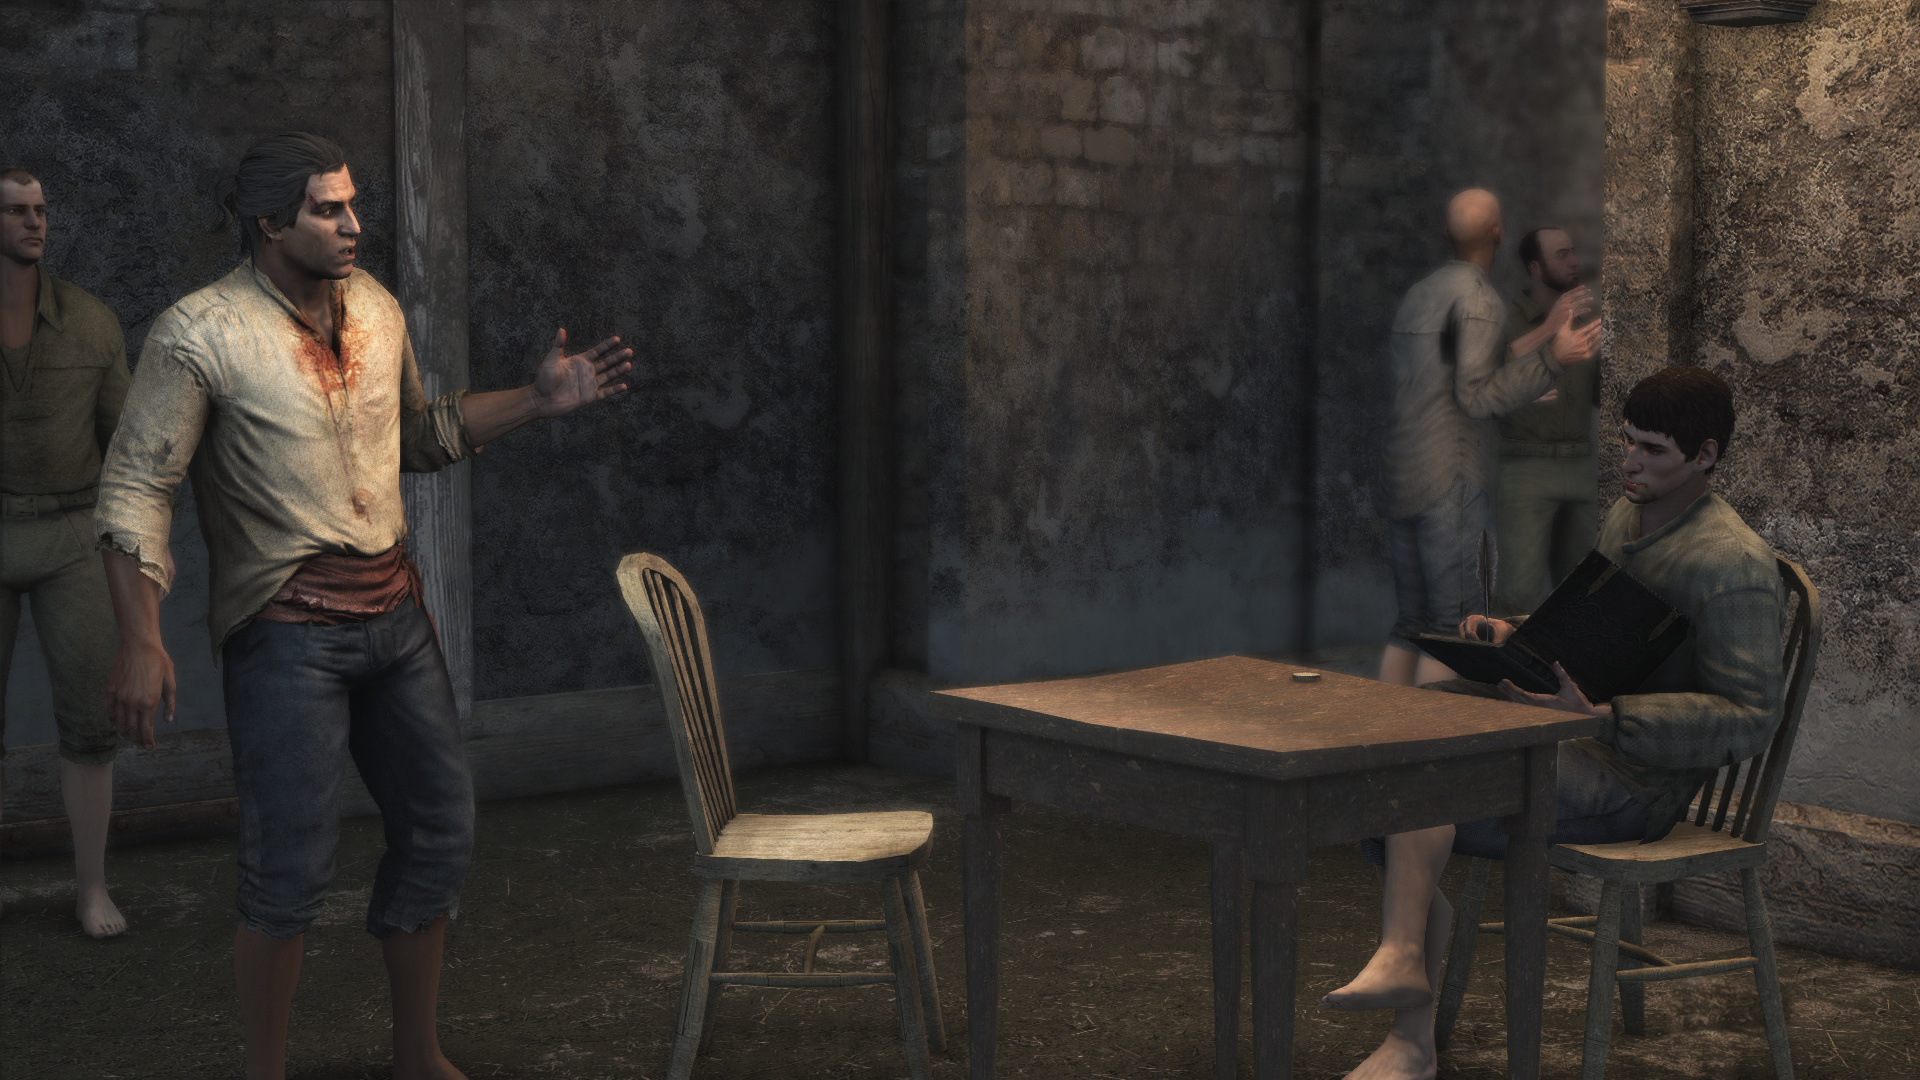
Although Connor chased Hickey through the streets and caught him, the two were apprehended by guards. Connor attempted to explain that he was not involved in the operation, but he was knocked unconscious, and he and Hickey were thrown into Bridewell Prison on charges of counterfeiting.[1]
Protecting George Washington
- Mason: "That man is our Jupiter Conservator, destined to lead us not just to freedom, but greatness. Anyone who says otherwise is either a simpleton or a traitor."
- Connor: "Then you understand why I need to get out of here. If I don't help him, he is going to die."
- ―Mason Locke Weems and Connor discussing George Washington.[src]

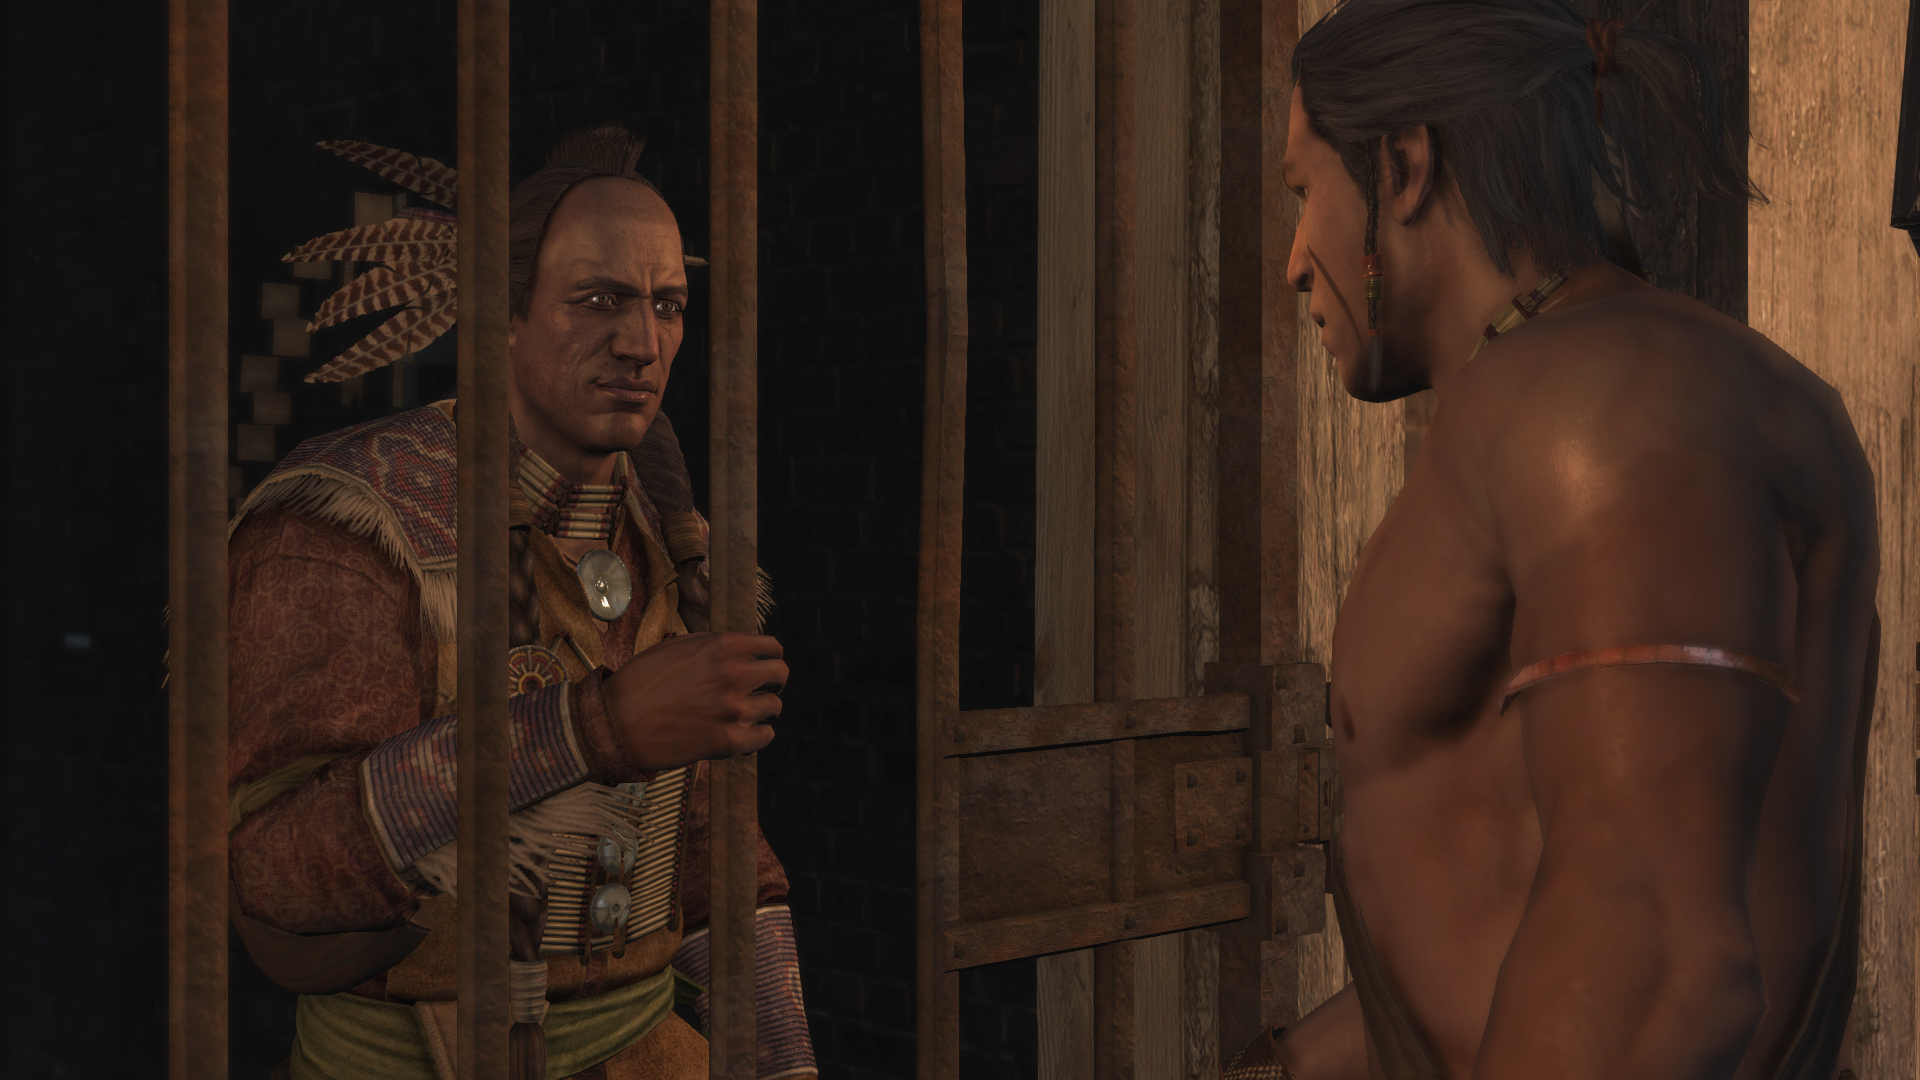
When Connor awoke in Bridewell Prison, he discovered that Hickey had been placed in the cell next to him, much to the latter's amusement. In response, Connor rebutted that at least Washington would be safe with Hickey imprisoned, but Hickey only pointed out the two Templars approaching his cell.[1]
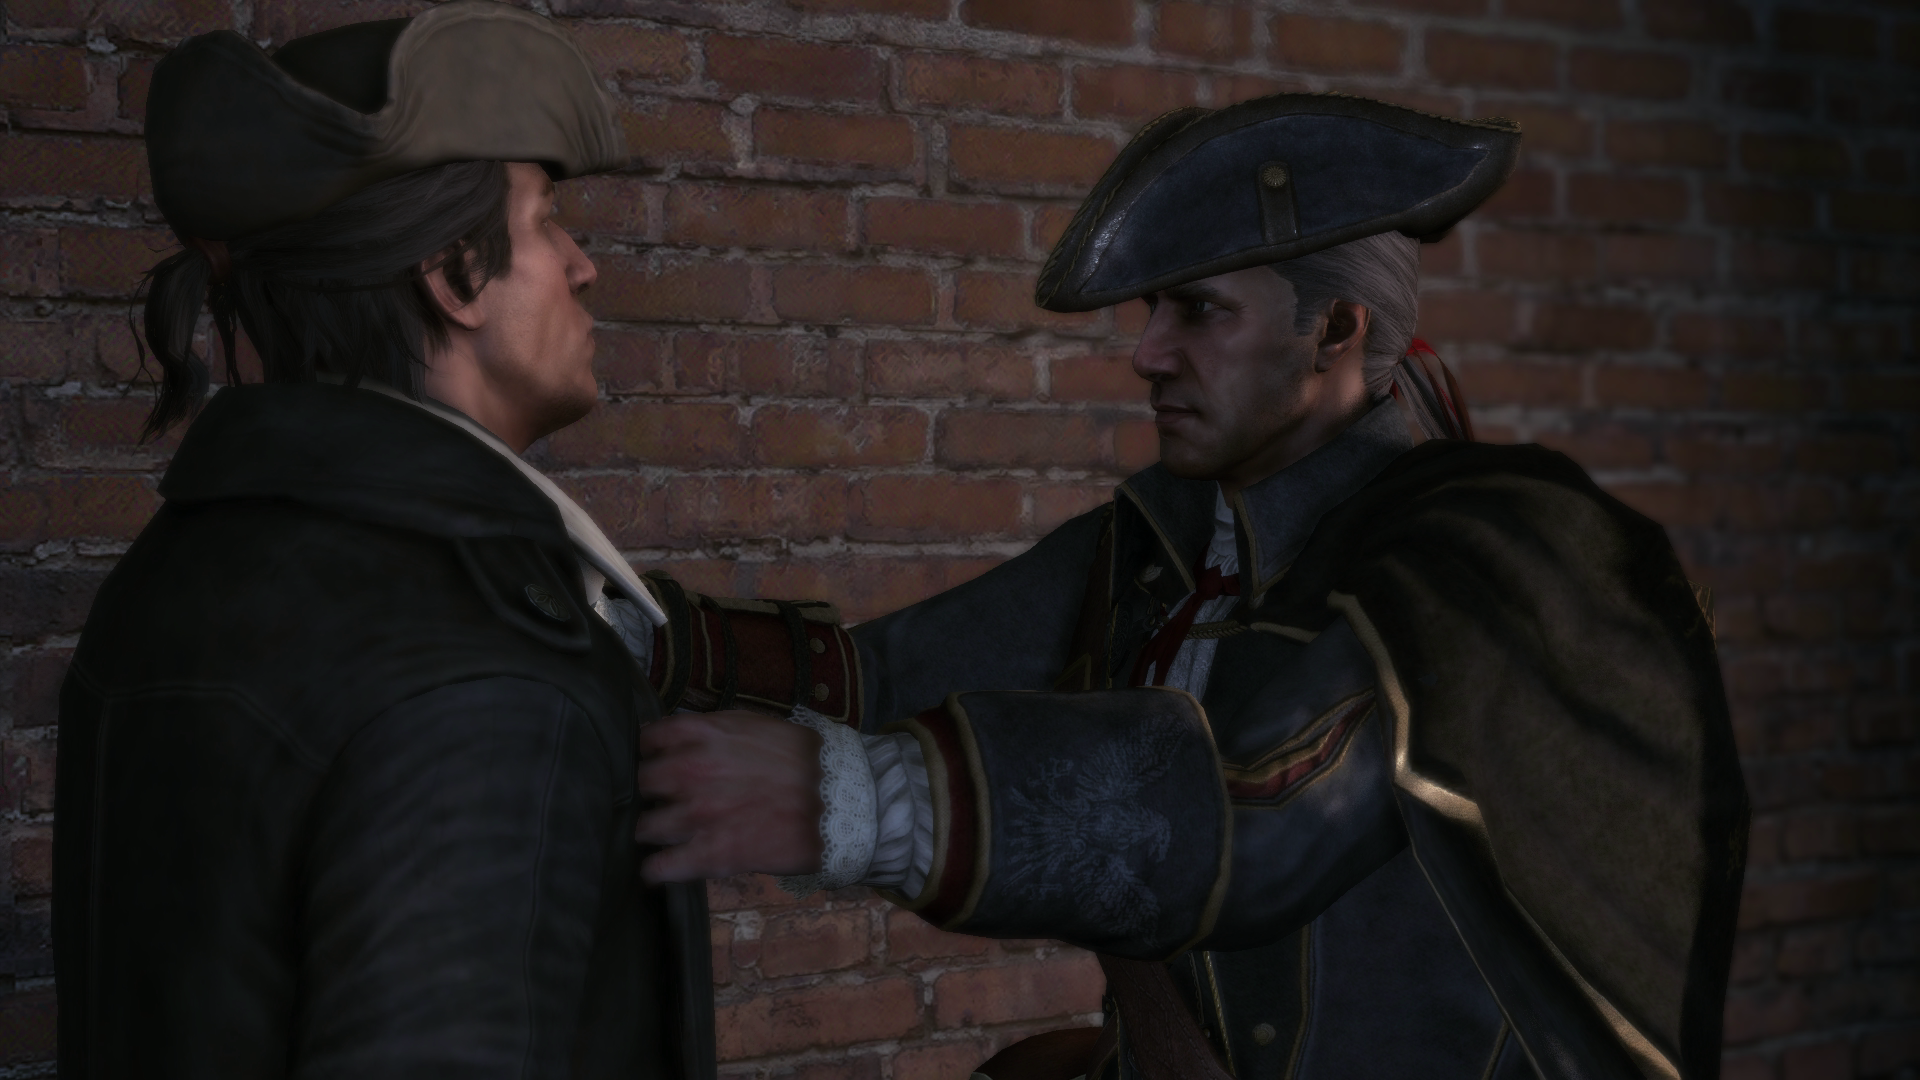
Charles Lee and Haytham Kenway released Hickey, though they told him that he was only moving to a larger cell, due to the on-going investigations for his involvement in a plan to assassinate Washington.[1]
Just as the Templars were about to leave, Hickey asked them what was to be done with the Assassin, and pointed out Connor in his cell. Haytham instructed Charles to deal with the problem, and the latter promised Connor that he had a plan for him, which would kill two birds with one stone.[1]
As the Templars departed, Connor eavesdropped on his fellow inmates and found that a prisoner, Mason Locke Weems, had crafted a key. Connor confronted Mason and found him to be cooperative after he mentioned the planned attempt on Washington's life, since Weems was a strong believer in Washington's role in the country's independence.[1]
Though Weems said that he intended to escape, the key he had been crafting over the past few months had just been stolen by another of the inmates. With this in mind, Connor stole the key back, but found that it did not open his cell.[1]
The next day, he confronted Mason again, who told him that the key was not meant to work, and that it was intended to be swapped with the warden's real key, so he would not notice the theft. However, the only way to get near the warden was to end up in "the Pit", a solitary confinement area of the prison. Begrudgingly, Connor started a fight with several prisoners, until the guards were forced to restrain him, and throw him into the Pit.[1]
There, Connor switched his and the warden's keys and sneaked into the higher portion of the prison, where he thanked Weems for helping him and promised to return the favor, before going to Hickey's cell. Upon reaching it however, Connor only found the body of the warden, and turned to find Lee and Hickey at the doorway.[1]
Holding him at gunpoint, the Templars explained to him that Connor would be brought to trial for plotting to assassinate Washington, and that they were considering pinning the murder of the warden on him as well.[1]
Connor attempted to disarm Lee, but the Templar only grabbed him by the throat and pinned him against the wall. Lee finally realized that Connor had been the young boy he had threatened years ago, and was gleeful about the irony that Connor had kept his promise to find him. Lee then knocked Connor unconscious, and he was dragged back to his cell.[1]
Connor awoke the following day and was transported to his execution site, where he was met by Hickey. Though Connor stated that he had thought he would be put on trial, Hickey cheerfully told him that trials were not permitted to those accused of treachery.[1]

Connor was led towards the gallows as dozens of spectators denounced him from all sides, and Washington, Lee, and Hickey looked on. However, as he neared the front of the crowd, he noticed several of his fellow Assassins killing the guards overlooking the event, and, after being punched to the ground by one of the spectators, Connor found himself being helped up by Achilles.[1]
The old man advised Connor to simply give a signal the moment he wanted to be freed. Though Lee spoke out Connor's supposed crimes to the crowd and placed the noose about his neck, the Assassin gave a whistled signal just as the trapdoor under him was opened. The noose was severed before it could strangle him, and Achilles pulled Connor to his feet under the gallows and handed him his tomahawk.[1]
Connor ran through the disordered crowd as his Assassin recruits faced off against Hickey's mercenaries, heading towards Washington, who was standing at the back with his bodyguards. Hickey rushed to Washington in a desperate attempt to assassinate him, but Connor caught up and struck Hickey down first. With his last breath, Hickey confessed that he did not care for the Templar cause, and had simply followed them since they held the money and power.[1]
Connor then found himself surrounded by several raised muskets, but Putnam arrived in time and ordered the Continental soldiers to stand down, pointing out that Connor had just saved Washington's life. From there, Connor asked where Washington had gone, but found he had already left for Philadelphia.[1]
Both he and Achilles traveled there, where Connor decided that he would tell Washington about the conflict between the Assassins and Templars, in order for the man to better understand about what he was up against. Achilles advised him not to, stating that it would only distract Washington.[1]
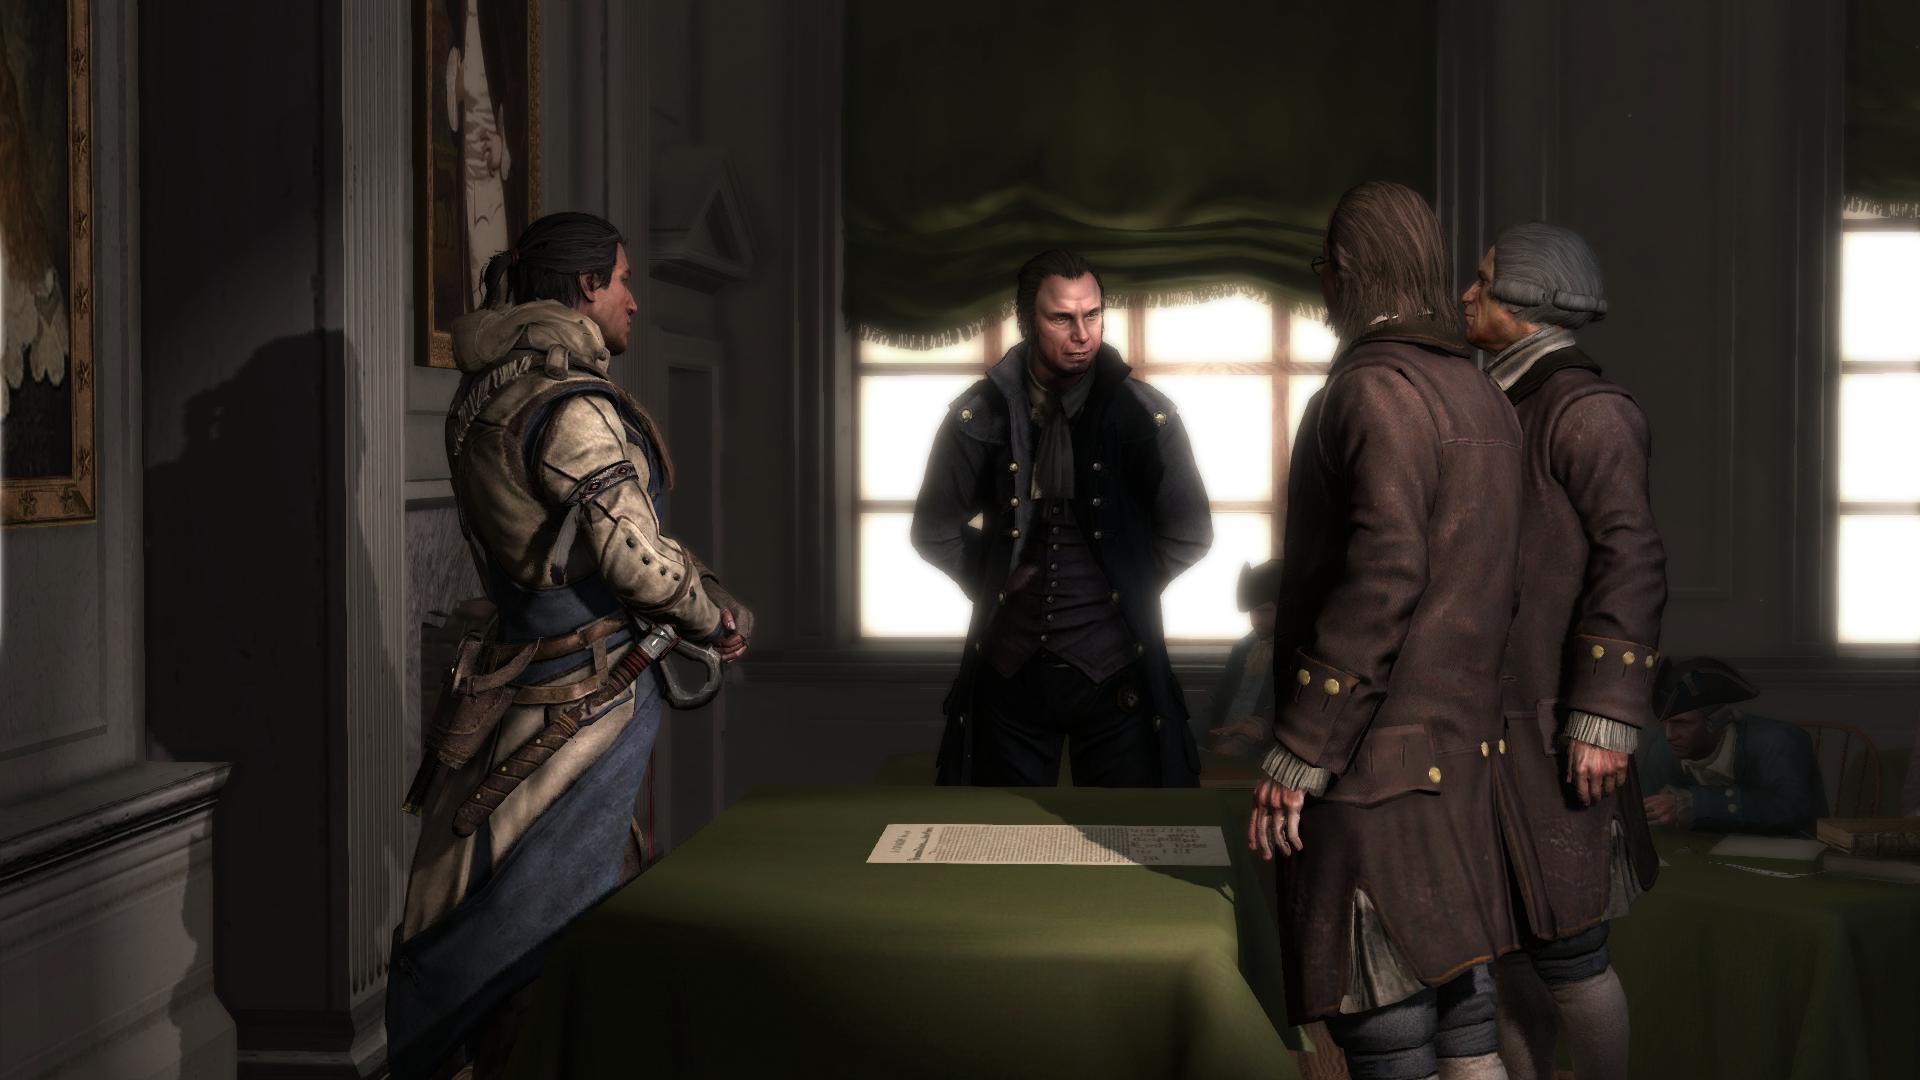
Once inside, Connor attended the signing of the Declaration of Independence, claiming the freedom of the colonies from British occupation, though Washington had already left for New York prior to his arrival.[1]
Hunting down the Randolph

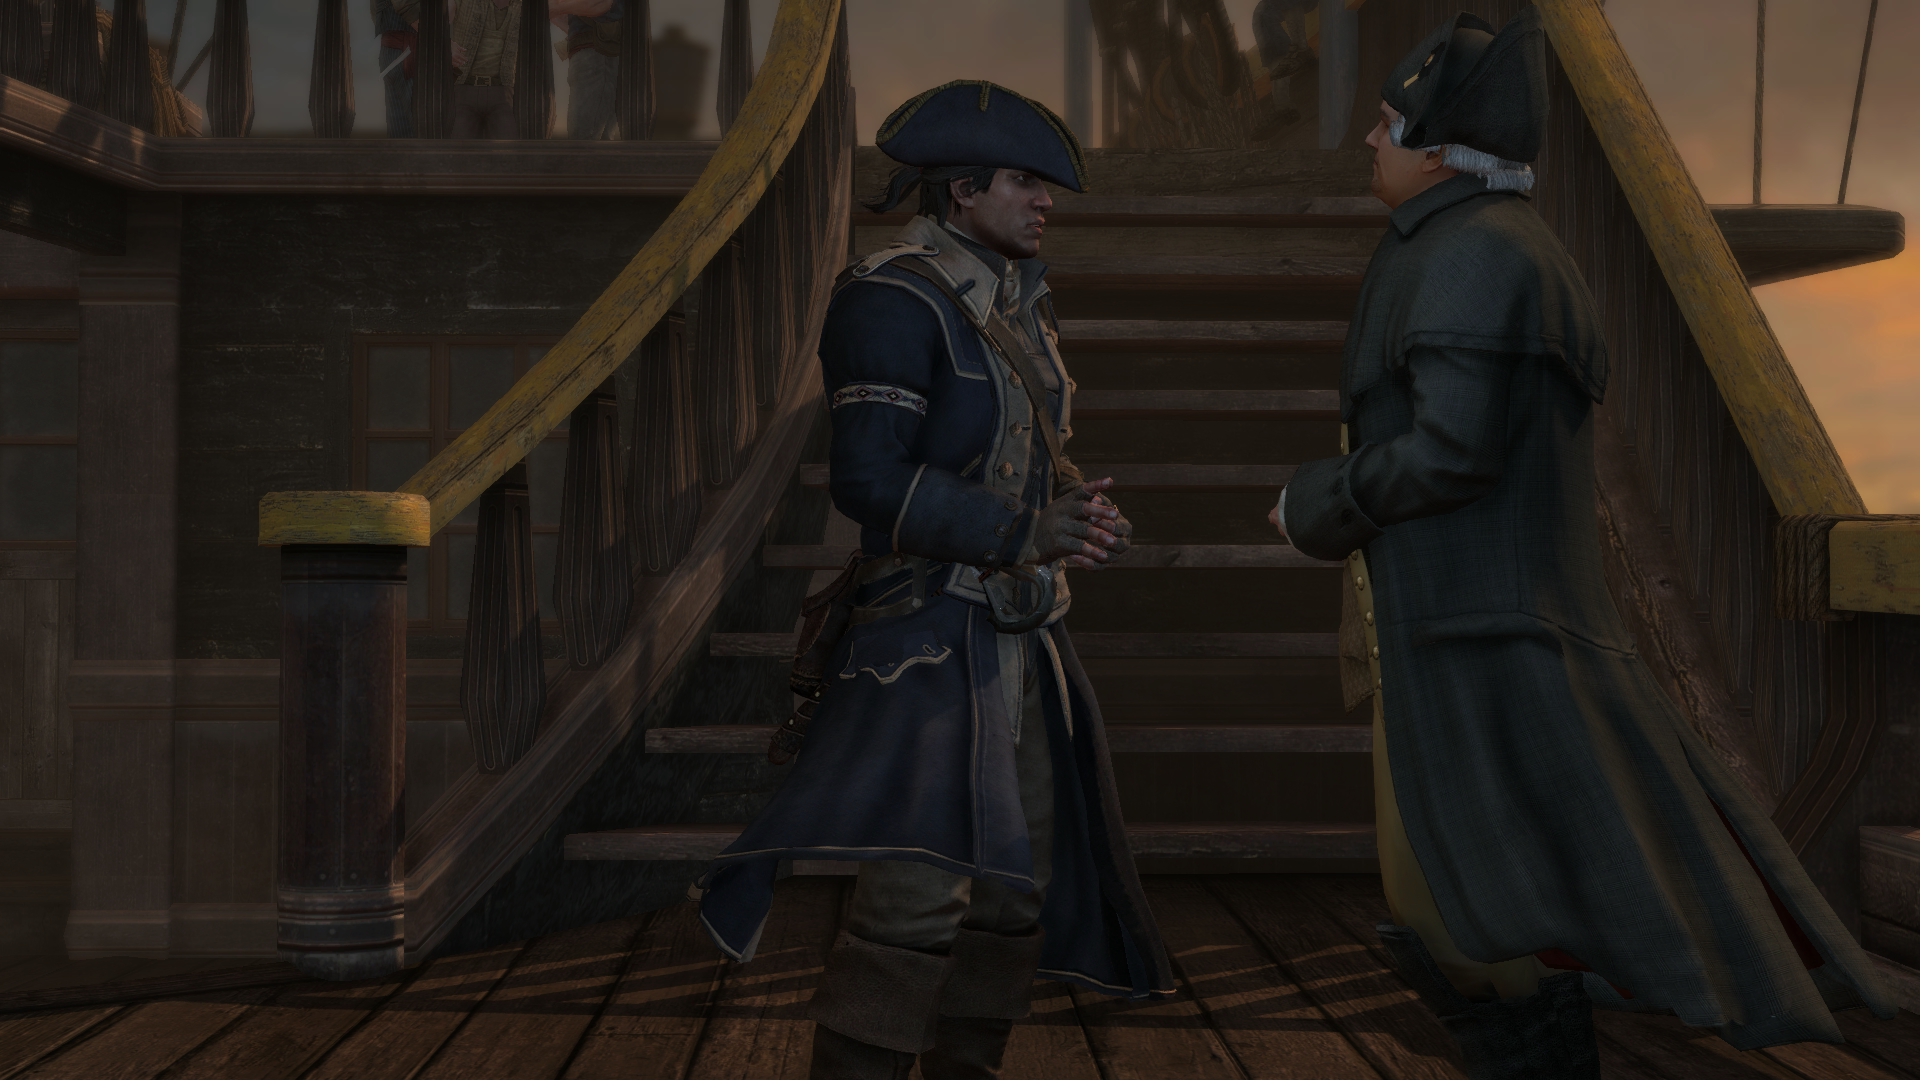
In 1776, Connor and Faulkner met with Amanda Bailey nearMartha's Vineyard, who told them about attacks on American ships by the USS Randolph, captained by Continental Navy captain, Nicholas Biddle. They gave chase to the Randolph, but were ambushed by several Templar ships. Though the Aquila sank all the ships with ease, they bought Biddle the time he needed to escape.[1]
Connor once again captained the Aquila, in order to escort the French ship, La Belladonna. It was made known that the Randolphwas supposed to escort her, but had left her alone in the open sea. As a safety measure, one of the Belladonna's crew stepped aboard the Aquila, as he wanted to ensure that his escort wouldn't run away like the Randolph had. Soon enough, Templar ships came to attempt to assault theBelladonna.[1]
The Aquila and La Belladonna sank several ships together, with theBelladonna sinking at least eleven of them, and the Aquila sinking many more. However, a Man-of-War intervened and destroyed La Belladonna's mast.[1]
Connor ordered his crew to fire chain-shot and destroyed the Man-of-War's mast, before boarding the ship and killing most on board. Following this, he quickly caught up with the ship's captain, and interrogated him.[1]
The Man-of-War's captain revealed that it was not the British that were attacking La Belladona, and that Biddle and all of the ships under his command worked for the Templars. Connor quickly saw the truth in this after recovering a ring with a Templar cross from his hand. After dealing with the man, Connor observed that the Randolph was nearby with his monocular. However, he couldn't give chase, as he had to protect the Belladonna.[1]
Finding Kidd's treasure
In 1776, Connor sailed to the Northwest Passage, to recover Hendrick van der Heul's map from the shipwreckOctavius. He obtained the map piece from van der Heul's corpse, just as the wreck began to sink into the freezing waters. On successfully escaping the Octavius, Connor read the third map piece's clue to be "And abreast the rock that doesn't fit." That year, Connor also sailed to Edinburgh Castle, Jamaica, recovering the next map piece from the dungeons of the serial killer Lewis Hutchinson. On navigating through the manor and solving the puzzle rooms within, the final map piece read "Close to a tree kissed by fire."[1]

After finally obtaining all of Kidd's map pieces, Connor and Faulkner assembled the document and determined that Kidd's treasure was located on Oak Island. Sailing there in 1777, Connor quickly worked out Kidd's riddles to find the sinkhole he buried his treasure in. After fending off wolves, Connor and Faulkner placed explosives to open the sinkhole, before the Assassin went underground to search. After precariously traveling through the limestone caves beneath Oak Island, Connor found Kidd's treasure – a simple ring – suspended between crystals.[1]
After recovering it however, the stability of the subterranean caves worsened, due to the explosives used to open the sinkhole, triggering a collapse; luckily, Connor was able to escape. Faulkner was disappointed to see Connor emerge with a mere "coin", only to be shocked when its energy field knocked his flask from his hand. Connor realized the value of Kidd's treasure and wore it to deflect gunfire from then on.[1]
Aiding Aveline de Grandpré

In the winter of 1777, Connor traveled to New York and met withAveline de Grandpré, a French-African Assassin from New Orleans. Aveline enlisted Connor's help in seeking out a Templar and Loyalist soldier named Officer Davidson, from Lord Dunmore's Ethiopian Regiment.[2]
Together, they tracked him down to a fort located within the New York frontier. While Aveline infiltrated the fort to locate the Templar, Connor moved around and diverted the attention of Davidson's guards.[2]
Following her confrontation with Officer Davidson, Aveline met with Connor again. Due to her recent work and the information learnt from Davidson, she had begun to feel uncertain about the means and ways of the Assassins. She asked Connor whether he believed fighting as an Assassin was the right thing to do, but instead of picking either side, Connor responded that he "[trusted] in his own hands" to be able to separate right from wrong.[2]
Working with Haytham
Despite his successes, Connor had come no closer to eliminating the threat the Templars posed to Washington. As winter rolled in late 1777, Connor decided to go and warn the man, though Achilles attempted to stop him, insisting that the Assassins worked quietly and did not go announcing conspiracies from the rooftops.[1]
In turn, Connor harshly criticized Achilles' faulty leadership of theColonial Assassins, which led to the Templars dominating the Colonies. Achilles reminded him that life wasn't a fairy tale and there were no happy endings, but Connor did not believe him, stating that was true only when men like Achilles were in charge. As he mounted his horse, Achilles sternly warned Connor that if he wished to save the world, he should avoid destroying it in the process.[1]
Connor met with Washington in the Continental camp in Valley Forge, where the commander confided in him that a large amount of supplies meant for his troops had not long been stolen.[1]
Washington concluded that Benjamin Church, a Continental traitor who had recently been released from prison, was likely to be behind the theft, and so he sent Connor to investigate an abandoned church nearby, where suspicious activity had been reported.[1]
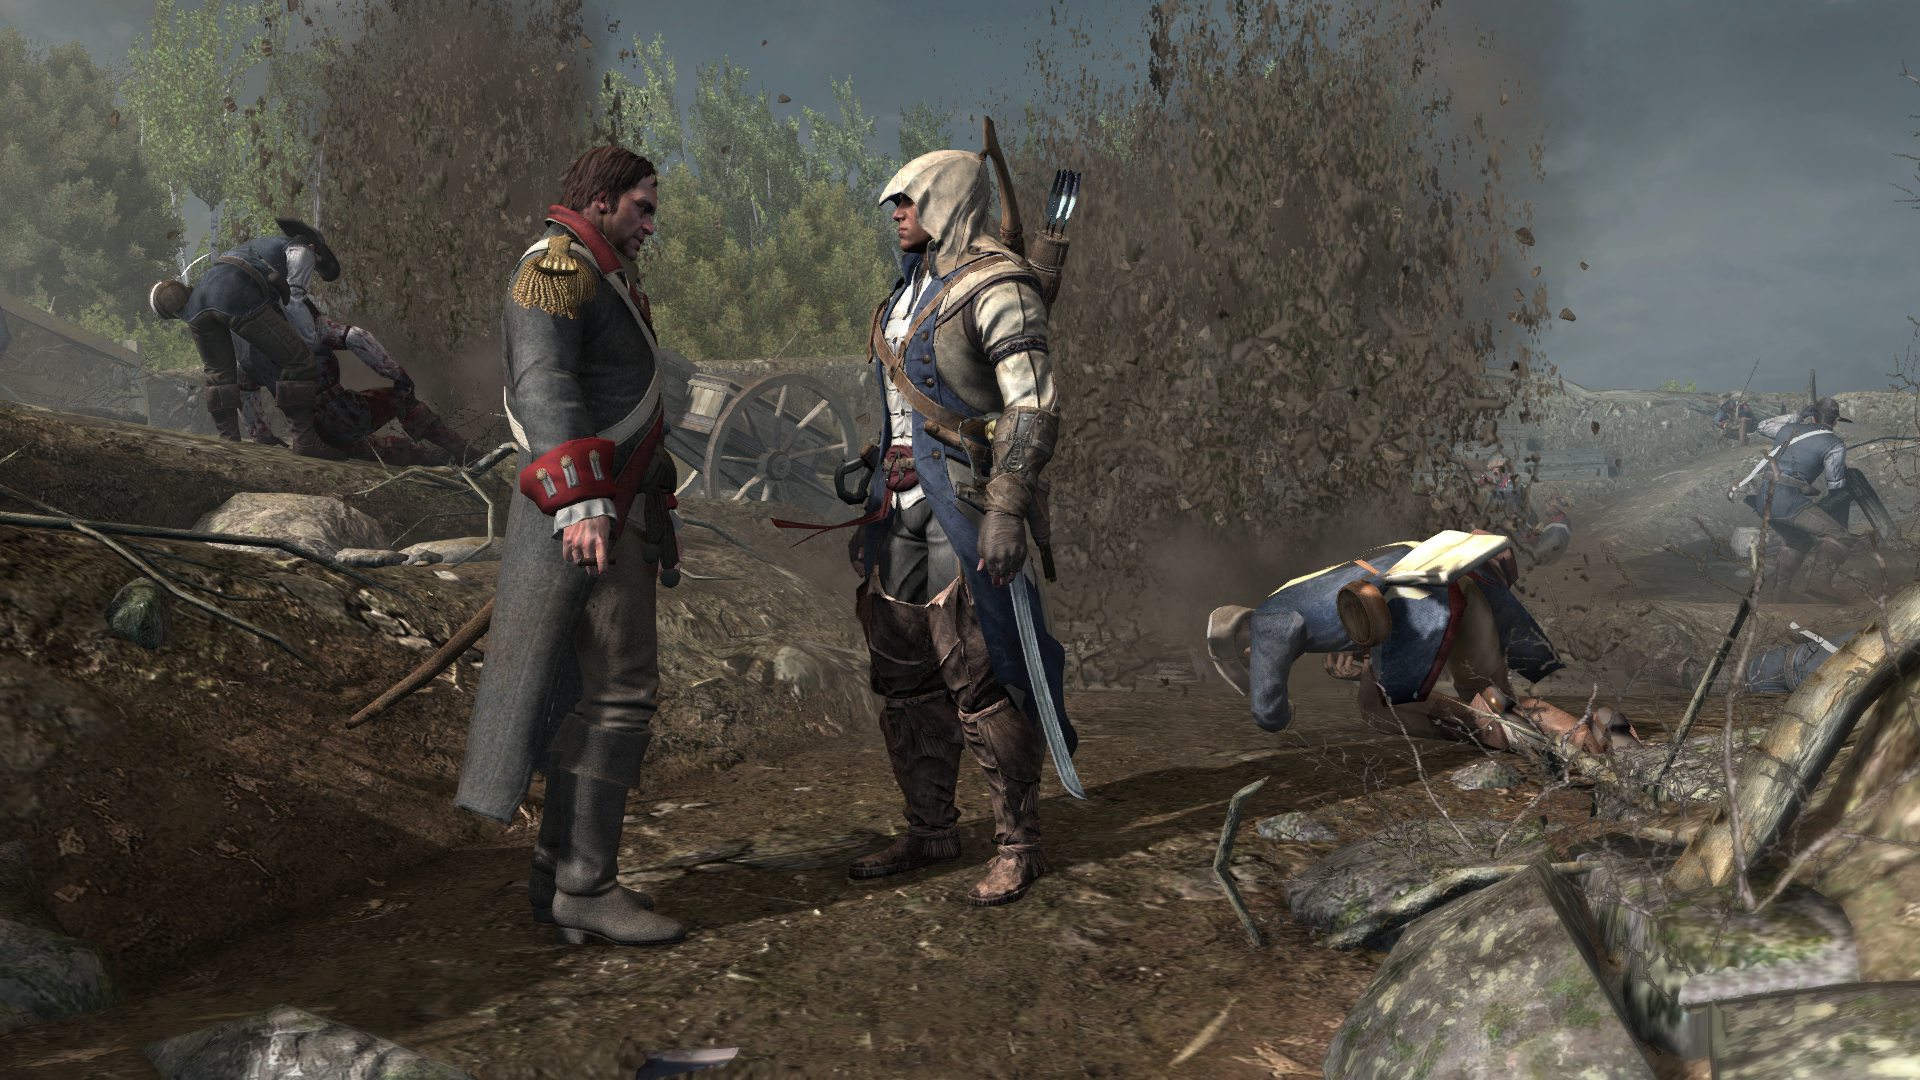
Connor arrived to find the church house seemingly empty, but as he walked inside, he was ambushed by his father, Haytham Kenway. The Assassin managed to slip from his grasp, and the two circled each other, with Connor accusing Haytham of coming to check whether Benjamin Church had stolen enough supplies for their British Army brothers.[1]
However, Haytham corrected his disillusionment that the Templars were working for the British, and admitted that Benjamin Church had turned against the Templars as well as the Continental Army. Haytham then suggested a momentary truce, as both of them wished to locate Benjamin Church.[1]
The two hunted Church's men through the frontier, and were eventually led to a warehouse in New York. Haytham's reputation permitted him free passage, though Connor insisted that he not enter alone, saying that they were to go on together, or not at all. Thus, in order for him to pass unquestioned, Connor disguised himself as a mercenary, and Haytham openly introduced the Assassin to the guards as his son.[1]
Inside, Haytham casually asked Connor about his mother, as Kaniehtí:io had cut all ties with Haytham shortly after Connor's conception. However, the Assassin only answered that she had been murdered under his orders, much to Haytham's shock. To this, Haytham claimed that he had ordered no such thing, though Connor ignored his father's protests, and only stated that he had run out of forgiveness.[1]

They moved forward to confront Church, but the man inside the warehouse revealed himself to be a decoy, and signaled an ambush. The Assassin and the Templar fought back the mercenaries successfully, and questioned one of them to discover that the Continental troop supplies and Church himself had just left on a ship called the Welcome.[1]
Shortly afterwards, riflemen shot nearby barrels of gunpowder and set the building ablaze, forcing Connor and Haytham to escape by jumping through a blocked window and into the water below, after having free-ran though the burning warehouse.[1]
Chasing Benjamin Church
Connor employed the Aquila to chase down Church's vessel, and after cornering the other ship, they were able to break down its masts with chained shots. As they drew near, Haytham pushed Connor from the wheel and rammed the Aquila into the Welcome; sparking a fight between both crews.[1]

Connor killed the officer on board, before following his father below decks. There, Connor found Haytham violently beating Church, and berating him for his betrayal of the Templar Order. Connor managed to restrain his father's temper, and he crouched by Church to question him personally.[1]
At Church's refusal to speak, the Assassin stabbed him with his Hidden Blade, and Church revealed with his dying breath that the supplies had been deposited at an island nearby. He also attempted to justify his actions, and stated that King George had every right to feel betrayed, and that the British were not without cause.[1]
Heartened after this event, Connor began to believe that there was a possibility that Assassins and Templars might be able to unite, due to their similar ideals and beliefs.[1]
Confronting Biddle

On March 17, 1778, the Assassin located the Randolph and pursued it during a stormy night. Biddle led them into an ambush, and the Aquila was soon surrounded by the Randolph and two Men-o-War. Despite the odds being stacked against Connor and Faulkner, the Aquila sank both the Men-o-War, and destroyed theRandolph's mast with a single broadside.[1]
From there, the crew of the Aquila boarded the Randolph and killed many on Biddle's ship. Despite this, Connor ran straight for Biddle, and dueled with him as his crew watched. During their fight, an explosion caused both of them to fall through the deck, and they continued their duel in the belly of the ship.[1]
When he mortally wounded Biddle, Connor stated that his reign over the colonial coast had ended, to which Biddle replied that Connor was foolish to believe him an enemy to the cause, and requested that he be allowed to sink with his ship. Connor fulfilled his last wish, much to Faulkner's dismay, who believed that the Randolph would have made a fine prize.[1]
Broken alliances
Some time after the assassination of Benjamin Church and Nicholas Biddle, Connor decided to once again seek out Haytham, in hopes of more permanently allying their Orders. After apologizing for his harsh words, Connor reconciled with Achilles, and then presented the idea of unity to him.[1]
However, Achilles openly disapproved, insisting that it was impossible to work alongside the Templars, and that the Assassins' goals could never be accomplished with Haytham still alive.[1]

Connor nevertheless tracked Haytham down to New York, where the Templar was working on discovering the plans of the British Army. Haytham was frustrated to find that his spies did not know what the plans were, and that they had only been told to wait for orders from above.[1]
Connor pointed out that it simply meant they needed to track down the British commanders, and the pair sought out a meeting of the commanders among the devastated buildings of New York's great fire. After ambushing them, Haytham and Connor were able to detain three of the commanders, the last one having been recaptured during an attempt to flee.[1]
Within his quarters in Fort George, Haytham questioned each in turn, and the three revealed the British forces' plans to withdraw from Philadelphia and march for New York within the next two days.
Following the interrogation, Haytham slit the throats of all three, much to Connor's disapproval. Though angered by his father's merciless actions, Connor turned his attention to more important matters, and left to warn Washington of the British troops' movements.[1]

Haytham insisted on meeting up with Lee instead, but Connor refused. As Connor explained the situation to Washington, Haytham slipped behind the commander and took the correspondence he had been reading.[1]
Haytham wondered aloud what the note contained, and read out to Connor that the commander had just ordered the burning of his village and the salting of their lands; since many of the Kanien'kehá:ka had been aiding the British. The Templar also brought up the burning of Kanatahséton fourteen years previously, which Washington had also been responsible for.[1]
Enraged, Connor cut ties with Washington, much to Haytham's approval. However, as Haytham called for his son to leave with him to speak with Lee instead, Connor rejected him as well, correctly accusing Haytham of withholding the information until it suited him. After threatening to kill the two men should they try to follow or stop him, Connor rode off to prevent the messengers bearing Washington's order to attack.[1]
Connor managed to kill Washington's messengers as he traveled to his village, and arrived to find it unharmed. However, there, Oiá:ner informed him that Lee had already rallied several of the village's warriors to repel the invading Continental soldiers.[1]
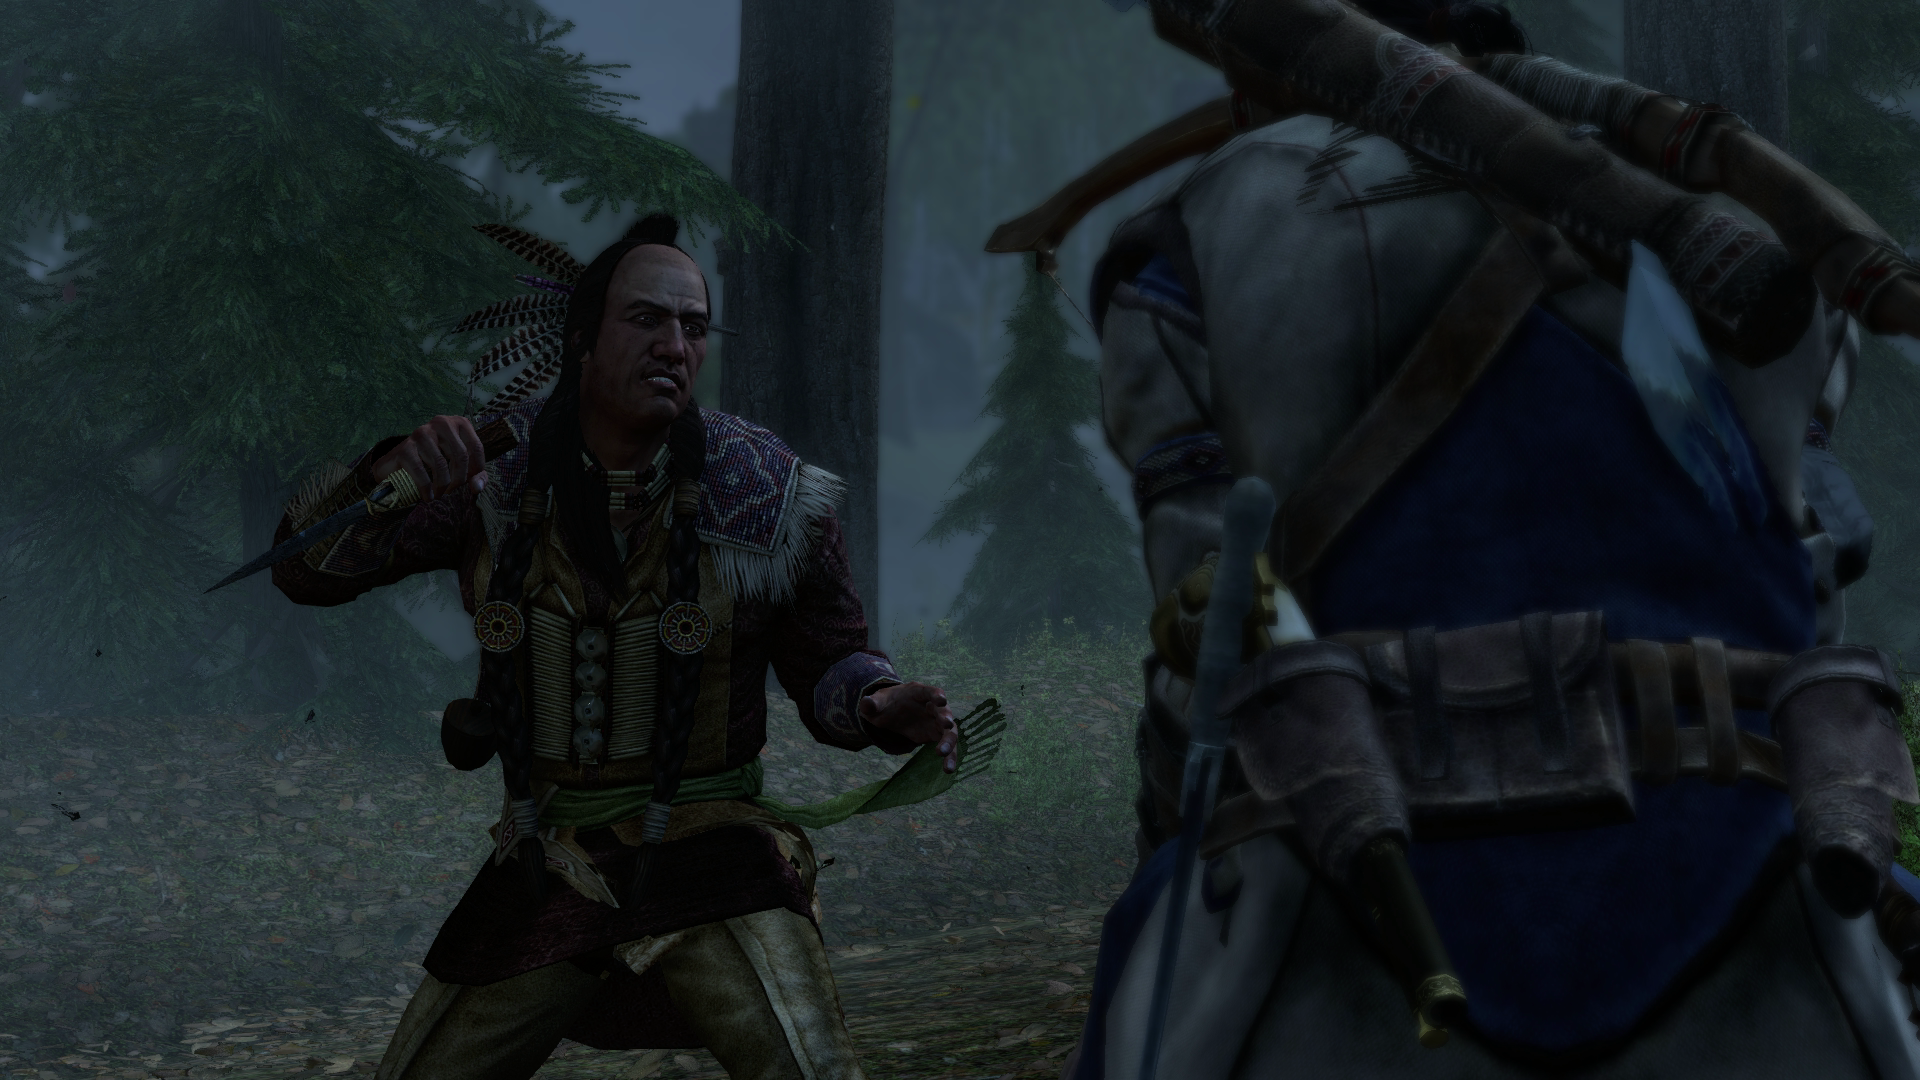
Unwilling for his village to become involved in the war, Connor knocked out each of the warriors readying to ambush the Continentals. However, as he ran towards the last one, Kanen'tó:kon, he threw Connor off and threatened him with a knife.[1]
Kanen'tó:kon angrily mentioned that he should not have believed Connor would protect their village, accusing him of turning against their people, and of being seduced by Washington's cause. Though Connor desperately insisted that Lee had fed him lies, Kanen'tó:kon attacked him. After a struggle, Connor was forced to kill his friend.[1]
Battle of Monmouth
- "Should you choose to spare Lee's life then I will take it myself. Enjoy your victory, Commander. It will be the last I deliver you."
- ―Connor to Washington after the Battle of Monmouth.[src]
Connor later pursued Lee to Monmouth, and arrived to find a contingent led by Marquis de Lafayette. Lafayette told Connor that Lee had showed up moments before to take charge; screaming at everyone to advance before riding away. At that moment, a large number of British soldiers came to surround the area, and Connor volunteered to cover their retreat.[1]

Connor and a small group of Lafayette's elite held off the advance with cannon fire, before falling back as well. The Assassin then rescued several Continental soldiers being lined up for execution throughout Monmouth, before reaching the main force of the Continental Army led by Washington.[1]
There, Lafayette congratulated Connor for saving so many lives, but the Assassin only turned to address Washington. Connor told him that Lee had betrayed the Continental Army; a claim that Lafayette supported, due to Lee's unusual behavior before the battle. Washington said that he would look into the issue, but Connor irately responded that the time for doing such had passed.[1]
As Connor departed the battlefield, he warned Washington that if the latter spared Lee's life, he would take it himself.[1]
Investigating West Point
- Washington: "Whom can we trust now, if Patriot heroes are betraying us...?"
- Connor: "You reap what you sow."
- ―Washington and Connor conversing after Bendict Arnold's escape.[src]
Two years later, Washington called upon Connor again to take out spies he suspected of planning to assassinateBenedict Arnold. Connor decided to take up the offer, but ordered Washington to never call on him again. After dispatching the guards, Connor went to Arnold to inform him of the death of the spies.[3]
After aiding in distributing gunpowder to the troops, Connor spotted Arnold and his major, John Anderson, sneak off to discuss something. Tailing them, Connor discovered that Arnold himself was a spy, and Anderson was actually Redcoat Major André. Arnold sent André to deliver a letter to General Henry Clinton that offered Fort West Point's surrender for the sum of twenty thousand pounds.[3]
Following André, Connor witnessed the spy redressing himself as a Redcoat and being stopped by two Patriots, however, André botched up his attempts to get past them and Connor ordered the Patriots to search him, whereupon they found the letter.[3]
André was captured and Connor confronted Arnold. Arnold claimed that the letter was a farce, and was forged to ruin his reputation as a loyal Patriot. At that moment, West Point was attacked by Regulars and in the conflict, Arnold escaped on the Vulture.[3]
After defending the fort, Washington arrived to congratulate Connor, though the latter was angered that Arnold escaped. Washington lamented the fact that he was betrayed by a Patriot war hero, to which Connor angrily replied "you reap what you sow". Connor then left Washington to watch Arnold's ship leave.[3]
Last stand against the Templars
Battle of the Chesapeake
- Connor: "But with Lee gone, my father might..."
- Achilles: "Listen to me. You have not come this far to throw it all away over misplaced sentiment. Both men must die."
- ―Connor and Achilles on the latter's deathbed.[src]

In 1781, Connor went to Achilles, sickened and slowly dying in bed. Achilles requested news on the Revolution and Connor responded that the Colonists were winning, and that the country might finally be free from British rule. Achilles then told Connor that it was vital that both Haytham and Lee die, despite Connor's continuing belief that Assassins and Templars could unite.[1]
Afterwards, Connor met up with Lafayette in the mansion's basement, where Connor revealed his strategy of entering Fort George. To do so, he would need the French allies to disguise themselves as British so they could fire upon the fort, giving Connor the opportunity to kill Lee amidst the chaos. Lafayette agreed to the plan, but told Connor that he would be required to help the French naval ships at Chesapeake Bay in return.[1]
Before he left, Achilles requested Connor to find a painting in the burnt ruins of New York. Connor accepted and found an undamaged painting in the ruins, before returning to the homestead with it. Achilles told Connor not to do anything with the painting, until the time was right.[1]
Connor later returned to the mansion to find Achilles dead in his chair, having passed away after finishing writing a letter to Connor. The letter stated that all of Achilles' property would go to Connor, and that his appearance in the old man's life had given him great hope for the future of the new nation that Connor had helped to create. Connor and the homestead residents buried Achilles next to his wife and son, to be remembered as the "Old Man on the Hill." Afterwards, Connor finally hung Achilles' painting inside the manor – a portrait of his late family.[1]
At Chesapeake Bay, Connor captained the Aquila and aided the French in fighting the British, alongside the Marseillois and theSaint-Esprit. Soon, due to the overwhelming numbers the British possessed, both of the French ships were sunk, and a Man-of-War destroyed all of the cannons on board the Aquila.[1]
The reinforcements Lafayette promised were still far off, and the battle was still raging, so Connor was forced to ram the Aquila into the Man-of-War. Hearing his crew's apprehensive whispers, he boarded the enemy ship alone, leaving his crew behind. Connor then killed the captain of the ship, and shot its gunpowder cache, before quickly escaping onto the Aquila as the British ship exploded. Somewhat safe at this point, the French reinforcements arrived soon afterwards. From there, Connor requested that the leading admiral have the ships raise British flags, in order to approach the area surrounding Fort George without any trouble.[1]
Attack on Fort George
- Haytham: "I'm proud of you in a way. You have shown great conviction. Strength. Courage. All noble qualities. I should have killed you long ago."
- Connor: "Goodbye, father."
- ―Haytham to Connor in his final moments.[src]

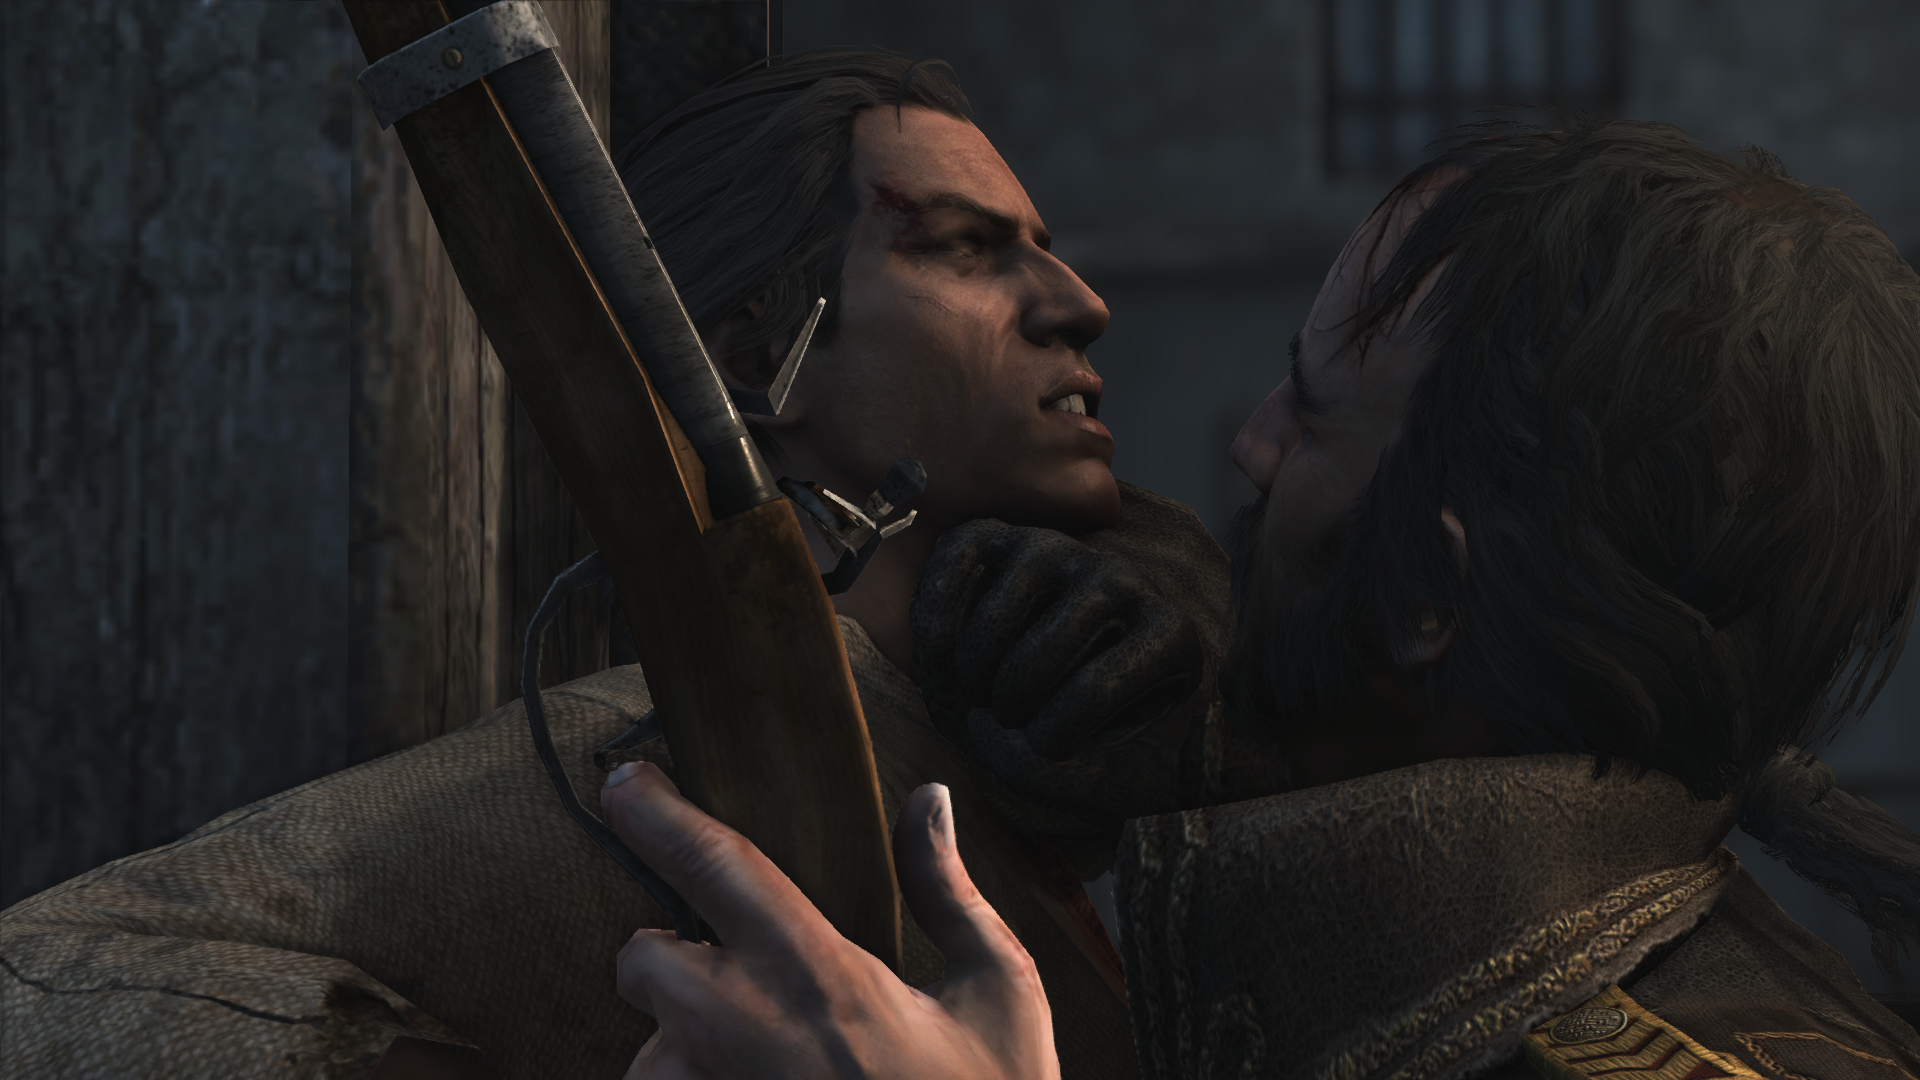
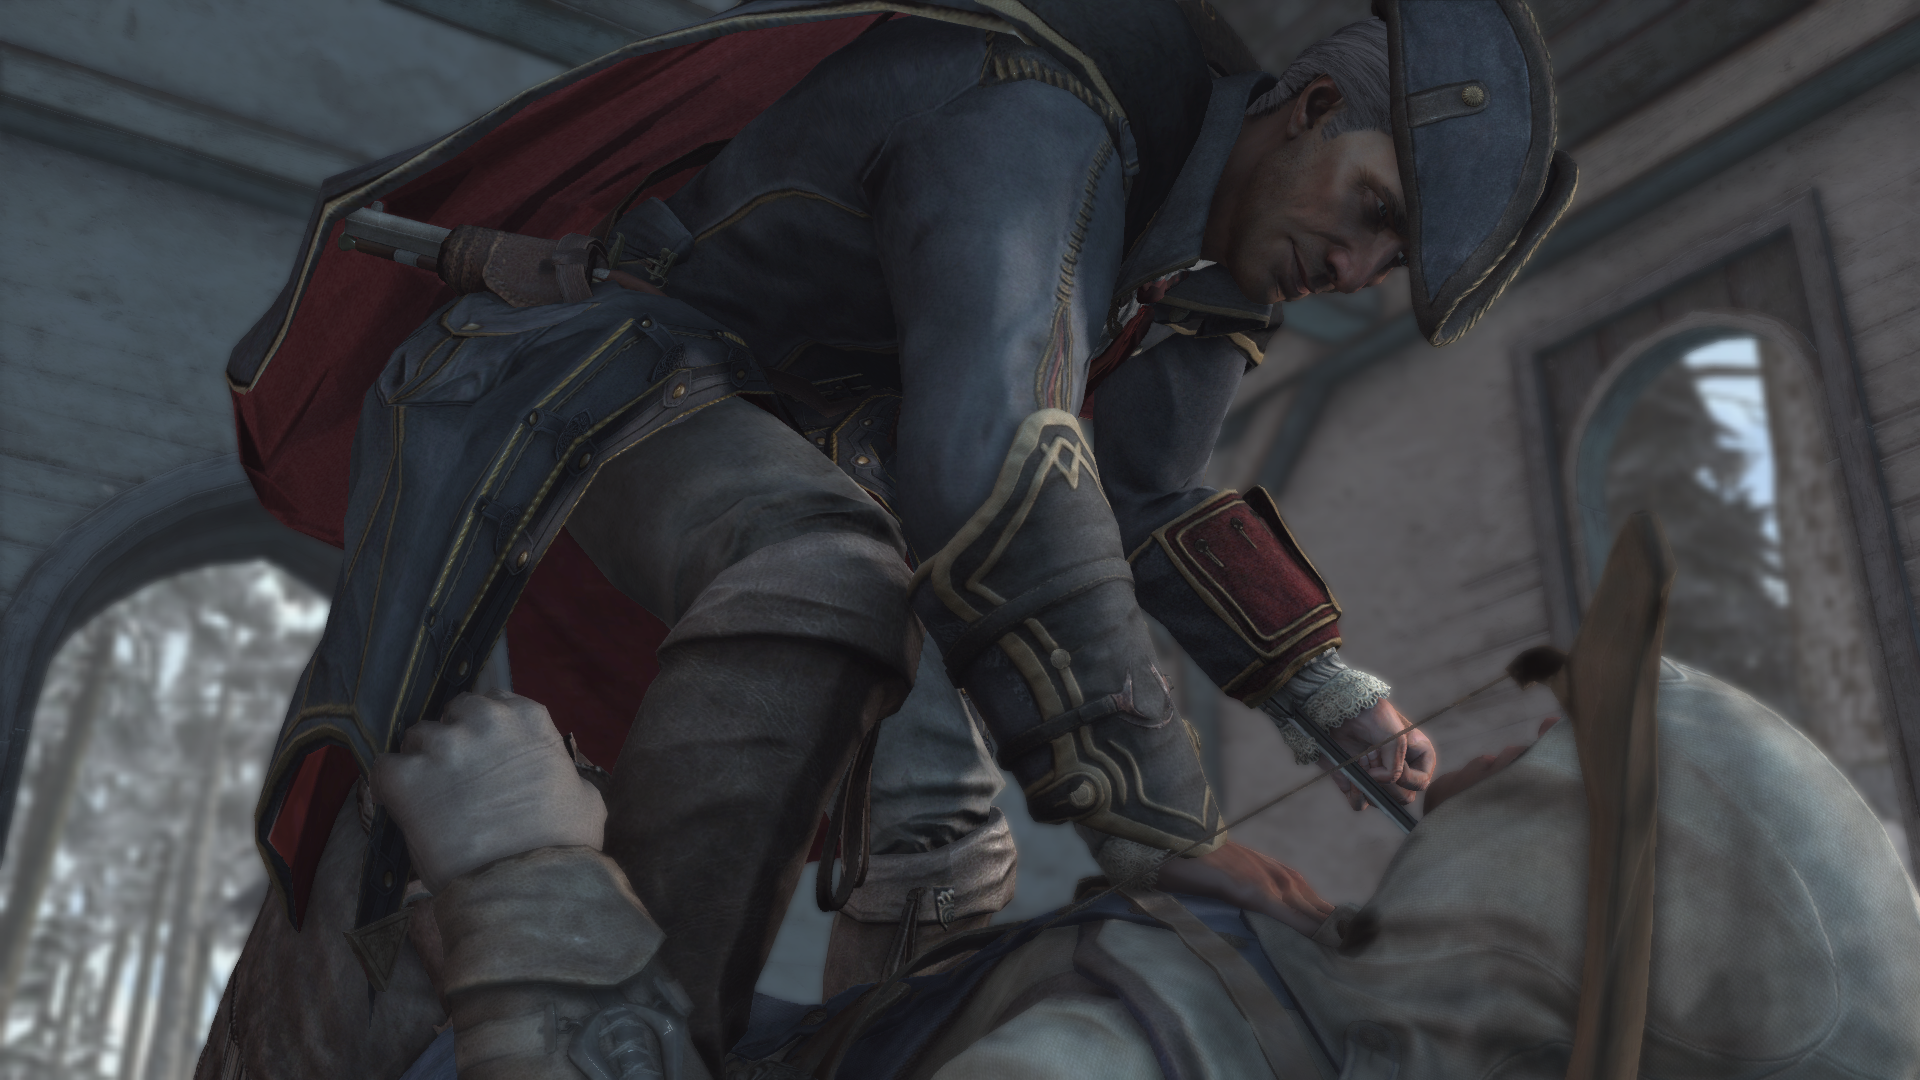
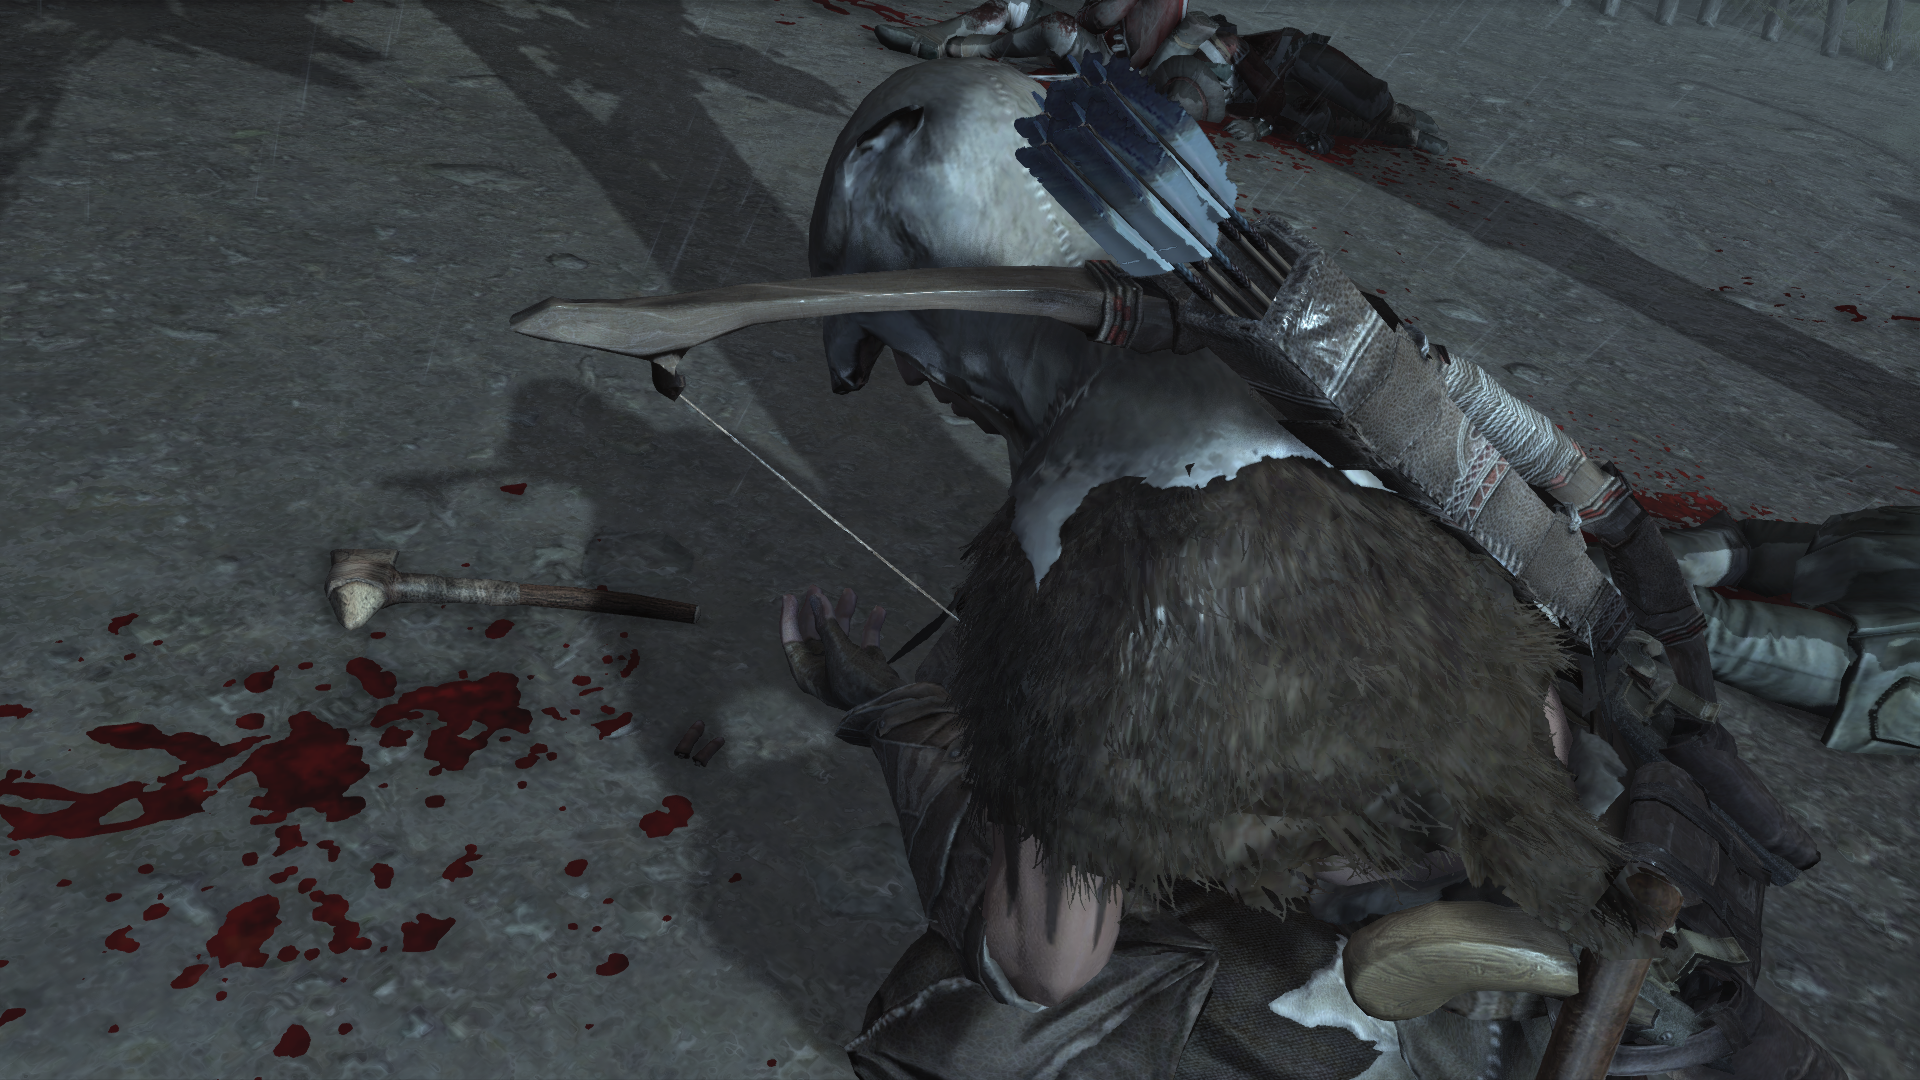
Entering the military district through the New York underground, Connor lit the signal for the ships to fire, calling forth a siege on the fortification. However, Connor was caught in the bombardment and injured. Limping into Fort George through a hole created by the cannonballs, Connor found himself confronted by his father, who had foreseen Connor's arrival and had sent Lee away.[1]
After a duel between the two, Haytham held Connor by the throat and began to strangle him. Partway through a speech about Connor's hopeless goals, his son stabbed him in the throat. In his dying words, Haytham stated that he was, in a way, proud of Connor, and that he should have killed him long before.[1]
Confrontation with Lee
- Lee: "Even those men you sought to save have turned their backs on you. Yet you fight, you resist. Why?"
- Connor: "Because no one else will!"
- ―Charles Lee and Connor's final words to each other.[src]
Following the encounter, Connor shaved his head into a mohawk and smeared his face with war paint. Confronting Lee, Connor was immediately captured due to his injuries. Lee, enraged by Haytham's death, declared that he would keep Connor alive so the latter could watch Lee destroy everything he had ever loved. Charles then left, ordering the guards to do with Connor as they wished, to which they began beating him. On his escape, Connor boarded a prison ship stealthily, and learned that Lee was in Boston before killing the leading officer on board.[1]
In Boston, Connor found Charles at the docks, who ran upon seeing him, ensuing in a chase that led to a ship under construction, which had caught on fire as a result of an accident. While Connor caught up to Lee in the vessel's interior, the ferry collapsed, causing more injury upon Connor.[1]
Charles, however, recovered and asked why Connor continued to fight despite being turned on at every point, even by the very men he sought to save. Connor replied, yelling "Because no one else will!" and shot Lee in the stomach. Wounded, Lee escaped the burning ferry.[1]

Limping to a harbormaster, Connor learned that Lee had fled to Monmouth. There, Connor found Lee at the Conestoga Inn, still bleeding but drinking silently. Upon spotting Connor, Lee offered Connor his drink, which Connor accepted. The two sat together for a while, observing the patrons.[1]
In the end, Lee looked over at Connor, and nodded slightly. This signaled Connor to stab Lee in the heart, killing him once and for all. Soon after, Connor retrieved the key to the Grand Temple from Lee's body, before setting him down on the table like a patron who had simply had too much to drink, to which the Assassin promptly left.[1][4]
Securing the future
- "It will never be enough. You strive for that which does not exist. Still you have made a difference. And you will do so again."
- ―Juno talking about Connor during their final encounter.[src]
Six months later, Connor returned to his village to discover his people had left. He spoke to a lone frontiersman sitting by a fire, who revealed that Connor's people had gone west and that a man in New York had been given the land by the newly formed Congress.[1]
When Connor asked how this had happened, the frontiersman told him that the country didn't have England to supply them with resources anymore, and that the Congress needed to do things themselves. He stated that the American government sold the lands for funds as they would be too much like England if they began to impose taxes, calling the Founding Fathers "clever men."[1]
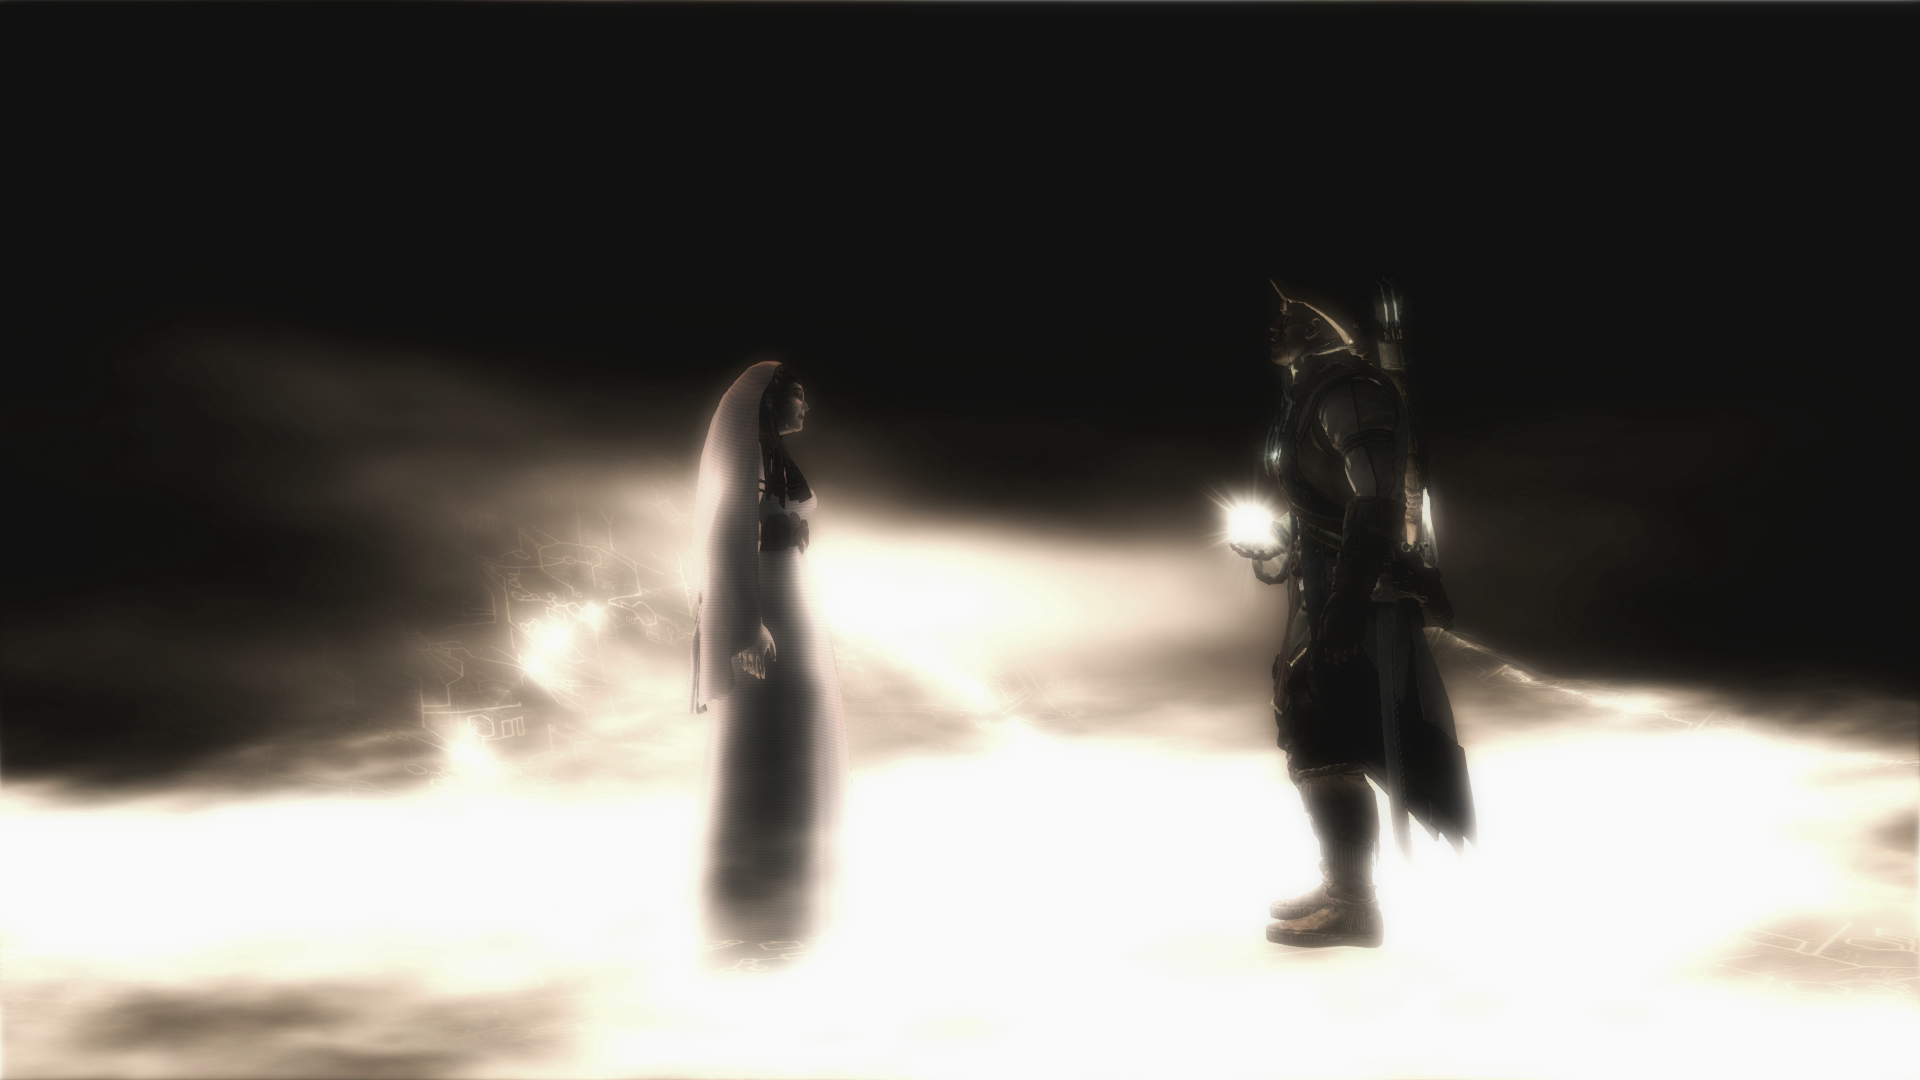
Connor then entered the longhouse where he had met with the Clan Mother many years ago, and opened the box containing the Crystal Ball, confused as to why it was left behind. Suddenly, the artifact triggered and Juno came to him once again. She was pleased to hear Connor had returned. Angered, he informed her that his people were driven out by those he had once considered his allies.[1]
Juno's physical form appeared to him and informed Connor that he needed to take the key he took from Charles and hide it where no one would ever look for it again. Still confused as to why he needed to hide it, Juno told Connor that he was only required to hide it and he would be free to live his life.[1]
Though Connor questioned Juno about his people, she reminded him of their purpose; to protect the Grand Temple. She elaborated that they had fulfilled their role, though Connor knew it wasn't enough for him, and Juno told him that complete justice did not exist, but he had made a difference, and would do so again. Once more, she reminded him to hide the amulet where no one would find it, and then Connor's vision faded with the Crystal Ball disintegrating.[1]

Following this, Connor returned to the Davenport Homestead and buried the amulet in the grave mound of Connor Davenport, Achilles' son and his namesake. Afterwards, he removed the portraits of the Templars and burned them in a fire. Walking back outside, Connor retrieved the tomahawk from the column he had implanted it in a decade ago, signifying that his war was over, and tossed it aside.[1]
From there, Connor left for New York, where the last of the British ships were leaving for England. As the colonists teased them from the land, the ship fired a warning shot which sank into the ocean. Connor turned and smiled at the colonists' freedom, but also saw a man selling African slaves. It was then that Connor realized not everyone in the new land had freedom just yet.[1]
During his time in the city, Connor also met with Washington to play bocce. He asked Washington what he would do now the war was over: when Washington responded he planned to retire, Connor expressed disappointment and argued that he should continue leading the country, in peacetime as well as war.[1]
Alternate timeline
Awakening in a different world
- "Mother! What are you doing here?"
- ―Ratonhnhaké:ton, expressing his confusion on seeing his mother again.[src]
Ratonhnhaké:ton was awakened by his mother, Kaniehtí:io, who alerted him to a threat in the forest. As he followed her, Ratonhnhaké:ton questioned Kaniehtí:io as to why she was alive and what was going on, though he received no answer. Soon enough, they met a Bluecoat ambush attacking a Native American woman. After dispatching the soldiers, the woman warned Kaniehtí:io that King George was looking for her and had attacked the town of Concord. Ratonhnhaké:ton and Kaniehtí:io then set out towards Concord in order to try and save the townspeople, while on route Ratonhnhaké:ton once more questioned his mother to why the woman had called Washington a 'king'.[5]
As they reached the top of a hill, the pair witnessed a group of Bluecoats forcing the townspeople into the church and barricading the door, while the troops' leader demanded that the citizens inform him of the whereabouts of Kaniehtí:io. Due to the townspeople insisting they did not know her location, the Bluecoats set fire to the church. In response, Ratonhnhaké:ton and his mother quickly ambushed Washington's men and liberated the townspeople, only for a cannon ball blast to kill the group before they could escape.[5]
Meeting King Washington
- Ratonhnhaké:ton: "Commander Washington! Why are you doing this? After all we accomplished! Take hold of your senses!"
- Washington: "Another delusional savage. I have never had such a firm grasp on my senses. Now bend your knee to your monarch, and make penitence in the last moments before you are blasted to your dread reward."
- ―Ratonhnhaké:ton and King Washington upon their meeting.[src]

Later, both Ratonhnhaké:ton and Kaniehtí:io returned to their village, where Ratonhnhaké:ton witnessed his mother argue with Oiá:ner about a strange herbal tea made from the Red Willow, with Oiá:ner arguing that the Kanien'kehá:ka needed it to prepare for Washington's attack.[5]
Kaniehtí:io countered this claim by stating that in the end, the consequences of the tea would have been too severe to justify using it. Eventually, she stormed off, and as Ratonhnhaké:ton followed her into the longhouse, Kaniehtí:io gave him a pair of Hidden Blades that his father had left for him, though she showed slight surprise in how Ratonhnhaké:ton was familiar with the weapon. Ratonhnhaké:ton then attempted to explain that the whole situation was wrong, but before he could finish, the Bluecoats attacked.[5]
The newly-appointed King Washington, accompanied by Benedict Arnold and General Putnam, killed Ratonhnhaké:ton's mother with a blast from a scepter containing an Apple of Eden. Enraged and grief-stricken, Ratonhnhaké:ton attacked Washington, only to be easily defeated by the Apple from which the power originated. Knocked back on the ground, weakened and vulnerable, Ratonhnhaké:ton was subsequently shot twice and stabbed with a musket in his chest by Washington, to which he slipped into a state of unconsciousness.[5]
Drinking the Red Willow tea
- "I am sorry, Mother. I must speak to Washington, to make sense of this, it is the only way."
- ―Ratonhnhaké:ton, apologizing to his mother for drinking the tea.[src]

When Ratonhnhaké:ton awoke in a cave, five months had passed. There, the Clan Mother told Ratonhnhaké:ton what had happened, and she noted that he wasn't surprised at witnessing his mother's death; in fact, she stated that he took her murder very well.[5]
Ratonhnhaké:ton was then instructed by the Clan Mother to climb the frontier's Red Willow, pluck its virgin boughs, and drink the willow tea brewed from them. Heeding her words, Connor ingested the tea and violently vomited, though he ventured on a spirit journey. At the end of the vision, Ratonhnhaké:ton gained the ability to become invisible at will, as well as summon a group of wolves to ambush his enemies.[5]
Shortly thereafter, he was requested by one of his fellow warriors, Kahionhaténion, to assist him in locating and rescuing his brother, Teiowí:sonte. The two tracked Kahionhaténion's brother and discovered that he was tied up along with other members of the village, who were lined up to be executed. Once Ratonhnhaké:ton and Kahionhaténion liberated their people, Ratonhnhaké:ton was instructed to return to the Clan Mother for further instruction.[5]
Hunt for Benedict Arnold

When he returned to their hideout, Ratonhnhaké:ton discovered that all of the villagers had been slaughtered, along with a dying Clan Mother. In her last words to Ratonhnhaké:ton, Oiá:ner told him to kill Washington, as well as Israel Putnam and Benedict Arnold, finishing what his mother had started. She also told him that Kaniehtí:io was right to be worried about the tea and warned him to respect its power. With a solemn promise to carry out her request, Ratonhnhaké:ton infiltrated Valley Forge, trailed Israel Putnam to a fortress, and discovered Benedict in the center of the stronghold. Once his guards had been defeated, Ratonhnhaké:ton confronted Benedict Arnold and mortally wounded him.[5]
Before Arnold died, Ratonhnhaké:ton told him that he had been waiting a long time to kill him for his defection to the British Army, though Arnold was bewildered by this and protested that he had never set foot inside West Point. Arnold further claimed that he was being controlled by Washington and told Ratonhnhaké:ton to liberate Benjamin Franklin in Boston, but died before he could say any more.[5]
Unbeknownst to Ratonhnhaké:ton, Putnam approached from behind and forcefully hit him in the head with the butt of his pistol, rendering him unconscious. Once fully awake, Ratonhnhaké:ton realized that he had been captured and was being transported in a convoy heading for Boston. Along the way, Putnam revealed his intentions of taking over Boston, likely intending to gain it as a reward for handing over Ratonhnhaké:ton to Washington.[5]
Finding Franklin
Upon arriving in Boston, Putnam presented Ratonhnhaké:ton in a cell to Washington and Franklin. Surprised to see that he survived their last encounter, Washington ordered that Ratonhnhaké:ton be beheaded as they left. Left alone and imprisoned, Ratonhnhaké:ton distracted the guards by turning invisible, before locking them in his own cell when they entered to investigate.[6]
Following this, Ratonhnhaké:ton discovered Kanen'tó:kon in the neighboring cell, and learned that his friend had joined Samuel Adams' resistance. Subsequently, Ratonhnhaké:ton freed him and recovered his own equipment, during which Kanen'tó:kon noticed a vial of the Red Willow tea. Deciding he ought to undertake his own spirit journey to help, Kanen'tó:kon attempted to drink the concoction, though by remembering Oiá:ner and his mother's words, Ratonhnhaké:ton interrupted him by insisting that it would be too dangerous.[6]
Responding to this, Kanen'tó:kon revealed that multiple animal spirits could be met through consuming the tea, so Ratonhnhaké:ton volunteered that he drink it instead, as he was already familiar with the spirit world and could handle the tea's risks. Journeying to the Sky World once more, Ratonhnhaké:ton encountered an eagle spirit and gained the ability to fly short distances.[6]
Ratonhnhaké:ton awoke, just as Bluecoats led by Franklin arrived to prevent their departure. Using his newfound power to secure his and his friend's escape, Kanen'tó:kon fought the remaining soldiers while Ratonhnhaké:ton chased after Franklin and tackled him on a rooftop. Dazed, Franklin began to awake from Washington's control, but was interrupted when the king himself teleported in and attacked Ratonhnhaké:ton.[6]

However, now armed with the power of the wolf and eagle, Ratonhnhaké:ton had an easier time attacking Washington, who was forced to escape by casting illusions of him taunting Ratonhnhaké:ton, and of Kaniehtí:io expressing anger at her son for drinking the Red Willow tea. As Washington managed to slip away, Kanen'tó:kon and Adams later found Ratonhnhaké:ton unconscious in the streets, to which they roused him and brought him to a safehouse.[6]
Ratonhnhaké:ton was determined to find Franklin, and was told of a tavern he could listen for information at. Avoiding the suspicious soldiers by playing a game of checkers, he eavesdropped on a messenger who was sent to deliver a letter to Putnam by Franklin. Pickpocketing the letter, Ratonhnhaké:ton learned that Franklin planned to meet Putnam at the docks, before he replaced the document to ensure its delivery. There, despite Franklin's meeting going awry, Ratonhnhaké:ton captured Benjamin after shooting him twice with arrows, finally freeing him of Washington's control, before taking the king's former lieutenant to Adams.[6]
Escaping Boston

Angered at Franklin's presence, Adams was skeptical of the man's change of heart and wanted him dead, though Ratonhnhaké:ton convinced Adams that Franklin had useful information to share with the resistance: Franklin immediately told them that Washington had gone to New York to deal with the rebels there.[6]
Disdainfully leaving Franklin in Ratonhnhaké:ton's care, Adams and Kanen'tó:kon planned to make their way to New York via the Boston Neck, thanks to a sympathetic Bluecoat captain, where they could then join with Thomas Jefferson's rebels. Franklin informed them he had created a special means of protection for Washington's palace in New York, and to bypass it they would require a special metal from a loyal blacksmith.[6]
Ratonhnhaké:ton met the blacksmith – who turned out to be David Walston, a resident of the Davenport Homestead that Ratonhnhaké:ton had helped – but learned that he had used the metal for horse shoes for a high-ranking soldier of Washington's. After Ratonhnhaké:ton stole the horse, Franklin pried off the horse shoes and then asked him to obtain his diagram from an officer at the tavern.[6]
Ratonhnhaké:ton met with the officer, who informed him of a massacre at Boston Neck. He explained Putnam had started a rumor that the captain at Boston Neck was friendly to the rebels, and claimed to have witnessed the death of Adams. Enraged by his gloating, Ratonhnhaké:ton smacked him with a checker board and promptly beat up the other soldiers in the tavern.
After taking the diagram, Ratonhnhaké:ton hurried to Boston Neck and verified the tragedy for himself, finding Kanen'tó:kon's tomahawk and severed fingers, and Adams' torn, bloodied uniform. Ratonhnhaké:ton returned to Franklin, informing him of their loss, and added that the pair would have to leave by sea.[6]
To do this, Ratonhnhaké:ton stole a Bluecoat's uniform so that Franklin could take him to an excellent ship he knew, and guarded the Founding Father along the way. At the docks, they found a drunken Robert Faulkner, who had the Aquila confiscated by Franklin. Ratonhnhaké:ton promised Faulkner that Franklin had turned on the king, and aimed to prove this by returning his ship. While Faulkner gathered a crew, Ratonhnhaké:ton took out the snipers at the docks and unfastened the ropes docking the Aquila.[6]
That morning, Faulkner's sailors charged the docks, but found that the Aquila had drifted into the sea. To secure their escape, Ratonhnhaké:ton fended off Washington's soldiers while the crew swam to the ship, until Putnam emerged, holding Kanen'tó:kon hostage. Putnam threatened to shoot him unless he gave up, though Ratonhnhaké:ton used his eagle powers to surprise Putnam and assassinate him.[6]

As he lay dying, Putnam acknowledged Washington's control but felt guilty, blaming himself for the evil that the Apple had simply unleashed within him. Afterwards, Ratonhnhaké:ton and Kanen'tó:kon made their break for freedom, dodging musket fire and diving into the bay.[6]
Later, aboard the Aquila, Kanen'tó:kon apologized, explaining Putnam had tortured him until he suggested that the rebels would escape by sea, but Ratonhnhaké:ton bluntly answered that he did not care. Then, as the Aquila arrived into New York's bay, the two gazed in awe as they spotted Washington's pyramid.[6]
Legacy
Connor's actions allowed his descendant, Desmond Miles, to find the key to the Grand Temple through the Animus and save Earth from the solar flare. He also eradicated most of the Templar Order's influence and control in Colonial America with his assassinations of their leaders.[1]
Along with this, his work in the Colonial cities of Boston and New York strengthened the Assassin Brotherhood with more recruits, and it assisted the people of the region. His support of the Continental Army lead to many victories, eventually allowing the North American colonists to break off from the British. In the process though, his work allowed the Americans to force his people farther west, away from their homelands.[1]
As the Captain of the Aquila, Connor was a major contributor to the safety of trade passages to Louisbourg, Saint-Augustine, the Bahamas and the Virgin Islands, by wiping out the privateers who preyed on ships there. As the owner of the Homestead's lands, he also helped several colonists that were experiencing hardships around the area. In addition, Connor's life was made accessible to an unknown group through hacking, and the anonymous team was able to learn about the Brotherhood.[1]
Personality and characteristics
- Aveline: "Are you always certain in the means and ways of the Brotherhood?"
- Connor: "I trust my own hands."
- ―Connor and Aveline.[src]
Connor was an honorable warrior with a strong sense of morality and heroism. He appeared thoughtful and intense, and the words he did not speak were just as meaningful as the ones he did. His movements resembled those of a predator, always staying low to the ground and moving under enemy attacks.[1]
He strongly believed in defending both his Native American heritage and country from European involvement, who he considered to be "outsiders". However, he also recognized the fact that, due to his parentage, he was a part of the issue that he sought to solve.[1]

Although, from the beginning, Connor's main motives were to protect his people and seek a misguided revenge on Charles Lee, for the burning of his village and the death of his mother in the process. Even though it was never mentioned, Connor only took part in the war for these reasons, of which he later learned that the latter was a disillusioned endeavor; one that his mentor Achilles warned him against on numerous occasions.[1]
This was evident by many of Connor's decisions and actions, one of them including him cutting all affiliations with George Washington, once he had discovered the truth of the general's responsibility towards the destruction of his village, as well as signing for a repeat attempt, despite Kanatahséton remaining neutral in the conflict.[1]
From the start, it could also be seen that Connor possessed an impatience with regards to hunting down his father, Haytham Kenway, which prompted Achilles to admonish the younger man for his recklessness. The older Assassin argued that as eager as Connor was, even if he caught up with his father, he did not have the proper experience to combat the older and more skilled man without Achilles' tutelage.[1]
Connor could at times appear to be quite cocky and arrogant. During the Boston Tea Party, Connor destroyed the final crate of tea in front of William Johnson and allowed him to leave the scene with his fellow Templars, believing that he had stopped their plans.[1]
Another example was that following the assassination of Thomas Hickey, he gave no credit to Achilles and his fellow Assassins for saving his life, despite the fact that it was clear he would have died without their interference. Often, he would argue with Achilles that he didn't need him and could have done everything he had accomplished without him. At one point, Connor even went as far as challenging Achilles to a fight to prove him wrong.[1]
Connor was also quite naïve as well, such as believing that the Assassins and Templars could form a permanent alliance following the stressful one between himself and his father Haytham.[1]
This is backed up when Samuel Adams was teaching Connor how to remove his notoriety, in which Connor questioned why he could not simply tell people the truth instead of lying to them. A final example of Connor's naïvety was allowing William Johnson to live following the Boston Tea Party, believing that he had lost the ability to buy his people's land.[1]
Despite this, Achilles described Connor as being quite humble, often playing down his own actions. Also, putting his near constant annoyance with Achilles aside, it was clear that Ratonhnhaké:ton cared for him greatly, which could be seen at both his funeral and when Ratonhnhaké:ton visited his grave shortly afterwards. At his grave, Ratonhnhaké:ton stated that he missed him nearly as much as his mother, implying that he thought of Achilles as somewhat of a father figure. In addition, he also promised that he would make Achilles proud.[1]
Equipment and skills

Connor was a capable free-runner, able to climb trees and swing from one to another, as well as scale cliff faces or other natural elements. He could move through the cityscape just as easily, and was able to slide under or vault over obstacles within urban environments.[1]
Accompanying his capacity to move fluidly, Connor was able to wield several different weapons – including a tomahawk, bow, flintlock pistols, rifle, rope darts, and Hidden Blades. He could dual-wield various combinations of these weapons, with his ambidexterity helping him to do so proficiently. He was of a strong and heavy build, giving him an advantage in combat, but causing him to make an effort when free-running.[1]
Connor was a skilled forager, and often hunted animals similarly to assassination targets; tracking and trapping several kinds that he encountered across the Frontier. He also possessed a rare extra-sensory ability known asEagle Vision.[1]
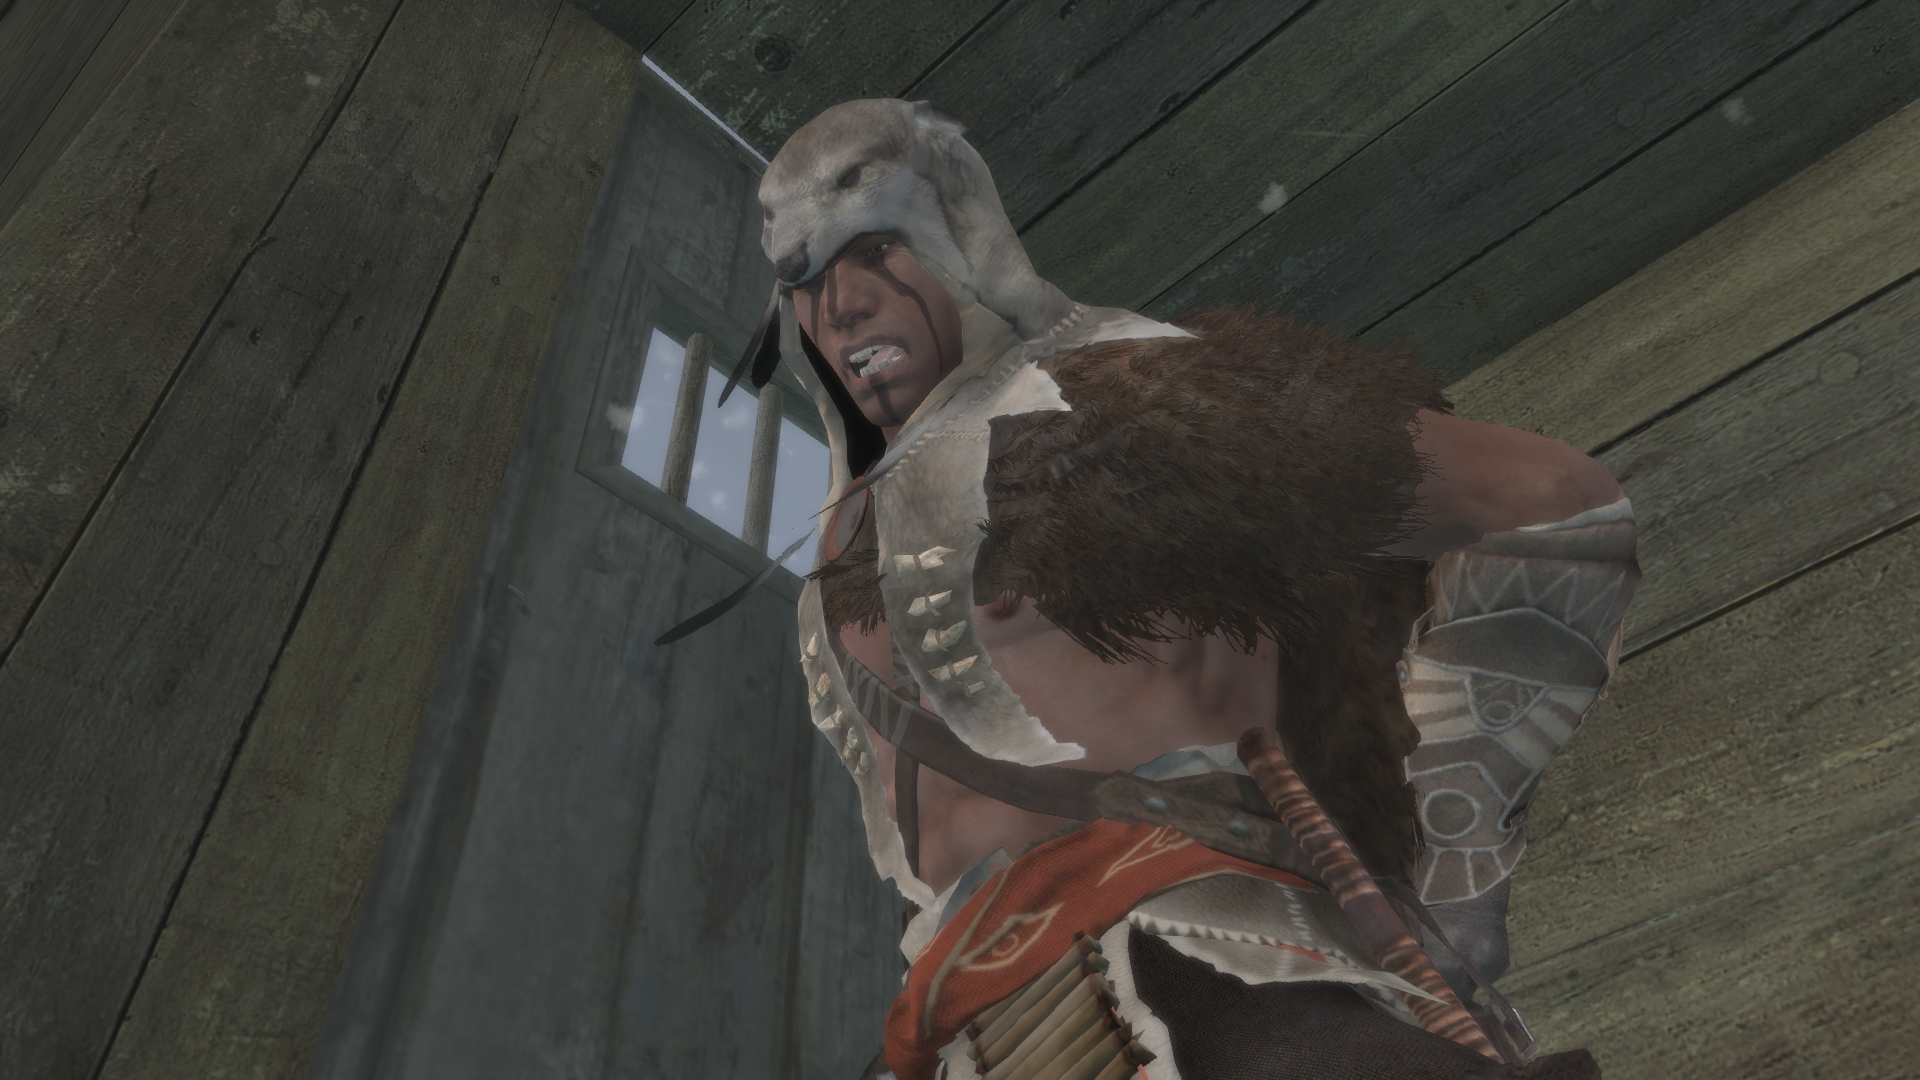
In terms of clothing, Connor was most often garbed in a hooded white dress uniform jacket with blue lining, as well as a thin red sash fastened with an Assassin insignia, and brown boots with leggings that extended past his knees. However, during his voyages on the Aquila, Connor wore a blue overcoat and tricorne hat.[1]
During these voyages, Connor recovered a Shard of Eden buried by William Kidd on Oak Island, which granted him immunity to stray gunfire.[1]
Trivia
 | An image gallery is available for
Ratonhnhaké:ton
|
- Several news media and publishers, even Ubisoft's own media, have dubbed Ratonhnhaké:ton as Connor Kenway. This is an error, as Ratonhnhaké:ton was never shown to formally adopt his father's surname.
- Contrary to several known Assassins (including Aquilus, Altaïr Ibn-La'Ahad, Ezio Auditore da Firenze, Aveline de Grandpré, and Nikolai Orelov) who possessed connections to eagles, Ratonhnhaké:ton was more closely linked to a wolf.
- "Ratonhnhaké:ton" (pronounced Ra-doon-ha-ge-doon) means "life that is scratched"; referring to his struggle to survive.[7]
- Since every Mohawk name is unique, at the advice of their Mohawk cultural consultants, Ubisoft agreed not to trademark the name "Ratonhnhaké:ton."[8]
- Voice actor Noah Watts based Ratonhnhaké:ton's voice on actor Wes Studi's portrayal of Magua in the 1992 film of The Last of the Mohicans, particularly his matter-of-fact delivery of the line "When the Grey Hair is dead, Magua will eat his heart." Watts also emphasized that English was Ratonhnhaké:ton's second language through not using contractions.[9]
- Unlike some of Desmond's other ancestors, Ratonhnhaké:ton had no scar on his lip, similar to Haytham and Edward. However, he did possess a scar on his right cheek.
- Ratonhnhaké:ton was unique amongst the other ancestors that Desmond viewed, as neither of his parents were Assassins.
- Ratonhnhaké:ton's initial character design displayed him with a slender build, while his final character model was altered to show him with a significantly more muscular appearance.
- Lead Game Designer Steven Masters mentioned that Ratonhnhaké:ton could originally scalp his opponents, but it was removed from the game since Ubisoft's Mohawk consultants felt that it was an unusual thing for their ancestors to do.[10]
- Of the known Assassins that Desmond Miles relived the lives of, Ratonhnhaké:ton was the only one who was not known to have killed any civilians. Altaïr killed an old man in Solomon's Temple during the search for anApple of Eden, and Ezio inadvertently killed several civilians in Cappadocia by destroying a large amount of gunpowder.
- The interactions between Haytham and Ratonhnhaké:ton showed similarities to William and Desmond, specifically concerning personality and conversations.
- If Assassin's Creed III: Liberation is synched to Assassin's Creed III, there was an exclusive mission with Ratonhnhaké:ton as the playable character. However, the reason why Desmond was unable to relive that particular memory was never explained.
- According to the Animus database, Ratonhnhaké:ton was the first Native American to join the Assassins.
- Watts stated that when he asked writer Corey May if Ratonhnhaké:ton would have a love interest, he responded the character was a virgin during the game's timeframe.[9]
- Character Designer Jeff Simpson expressed difficulty in creating Ratonhnhaké:ton, as there were no Mohawk Americans in the development team, despite them being multi-cultural.[11]
- Adding onto this, Ratonhnhaké:ton was initially supposed to be purely Native American until the team chose to make him a British-American.[11]
References
- ↑ 1.000 1.001 1.002 1.003 1.004 1.005 1.006 1.007 1.008 1.009 1.010 1.011 1.012 1.013 1.014 1.015 1.016 1.017 1.018 1.019 1.0201.021 1.022 1.023 1.024 1.025 1.026 1.027 1.028 1.029 1.030 1.031 1.032 1.033 1.034 1.035 1.036 1.037 1.038 1.039 1.040 1.0411.042 1.043 1.044 1.045 1.046 1.047 1.048 1.049 1.050 1.051 1.052 1.053 1.054 1.055 1.056 1.057 1.058 1.059 1.060 1.061 1.0621.063 1.064 1.065 1.066 1.067 1.068 1.069 1.070 1.071 1.072 1.073 1.074 1.075 1.076 1.077 1.078 1.079 1.080 1.081 1.082 1.0831.084 1.085 1.086 1.087 1.088 1.089 1.090 1.091 1.092 1.093 1.094 1.095 1.096 1.097 1.098 1.099 1.100 1.101 1.102 1.103 1.1041.105 1.106 1.107 1.108 1.109 1.110 1.111 1.112 1.113 1.114 1.115 1.116 1.117 1.118 1.119 1.120 1.121 1.122 1.123 1.124 1.1251.126 1.127 1.128 1.129 1.130 1.131 1.132 1.133 1.134 1.135 1.136 1.137 1.138 1.139 1.140 1.141 1.142 Assassin's Creed III
- ↑ 2.0 2.1 2.2 Assassin's Creed III: Liberation
- ↑ 3.0 3.1 3.2 3.3 3.4 Assassin's Creed III - Benedict Arnold (DLC)
- ↑ Assassin's Creed: Forsaken
- ↑ 5.00 5.01 5.02 5.03 5.04 5.05 5.06 5.07 5.08 5.09 5.10 Assassin's Creed III - The Tyranny of King Washington: The Infamy
- ↑ 6.00 6.01 6.02 6.03 6.04 6.05 6.06 6.07 6.08 6.09 6.10 6.11 6.12 6.13 The Tyranny of King Washington: The Betrayal
- ↑ AssassinsCreedUK: Inside Assassin's Creed III Episode One
- ↑ TIME: Assassin's Creed III's Connor: How Ubisoft Avoided Stereotypes and Made a Real Character
- ↑ 9.0 9.1 "The Assassin's Den - ft. Noah Watts (Connor in Assassin's Creed 3)"
- ↑ Assassin's Creed 3 Interview - Combat and the Apocalypse
- ↑ 11.0 11.1 Imagine FX Magazine December 2012
| ||
| ||
Advertisement | Your ad here
Photos
 Add a Photo
14,309PHOTOS ON THIS WIKI
See all photos >


Recent Wiki Activity
- Silas Thatcheredited by The Crimson Eagle 21 minutes ago
- Home Invasionedited by Kainzorus Prime 37 minutes ago
- Shipwreckededited by Kainzorus Prime 37 minutes ago
- Over Beams, Under Stoneedited by Kainzorus Prime 37 minutes ago